Wiring the Unotron for Raspberry Pi & Microcon 3

Wiring the Unotron with Raspberry Pi and Microcon 3

Click on any image to enlarge.

step10


For the basic mechanical building instructions, please refer to here


Step 1 – Fit the Mounting Pillars

step01a

For the Model B+ you should place 4 of the 25mm pillars in the positions shown above. (Note that the one bottom-right in above picture will need the screw removing later to allow the motor to sit properly on the baseplate)

For Models A or B only 2 pillars are required in the positions shown with red ring.


Step 2 – Fit the Raspberry Pi

step02

After screwing in all 4 pillars for the B+, then remove the screw underneath the bottom right-hand pillar so it sites on the baseplate but isn’t screwed in.

Also, note the rubber bumper on the bottom of the mounting pillar of the Microcon v3. This rubber bumper rests onto the PCB of all models (For the Model A and B, you can removed the rubber bumper so the Microcon sits flat with its pillar on top of the mounting screw)


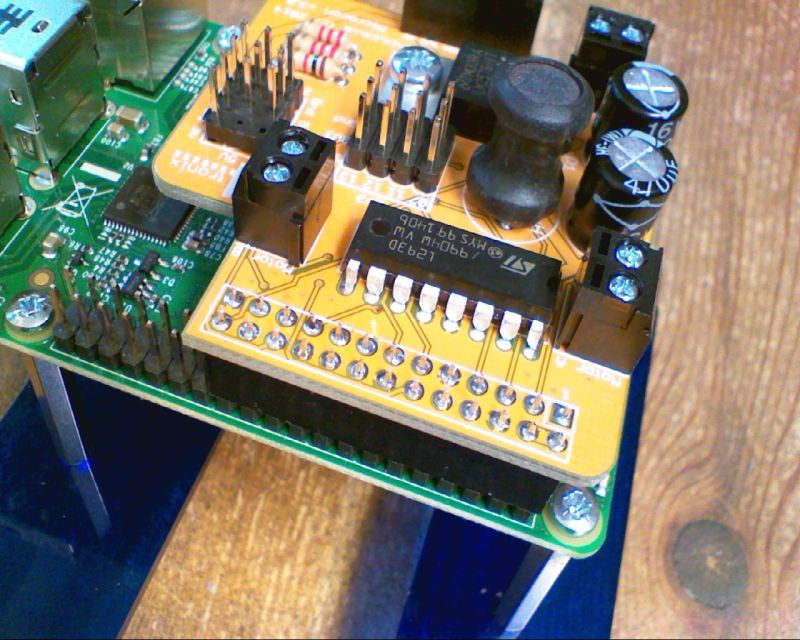
Step 3 – Push On the Microcon v3

step03

Make sure it is connect correctly to the end of the GPIO connector. For the B+ there will be 14 pins left exposed. For Models A and B, all pins will be covered.


Step 4 – Connect The Motor

step04

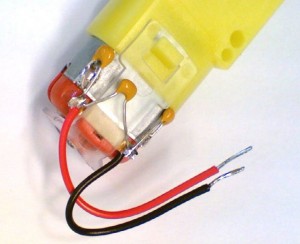
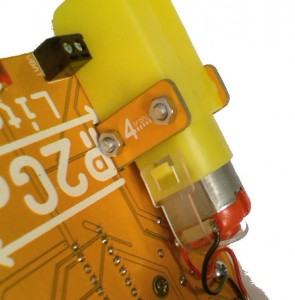
Screw in the motor (see instructions for base build here, steps 1 to 7

Depending on the wiring to the motor, you may need to swap the wires so that the software moves forwards and not backwards when required. Check this when first testing the software


Step 5 – Connect the Servo Lead

step05

Plug the servo lead into the position shown (marked 22 on the PCB). Make sure you have this the correct way round with the Black wire next to Gnd, Red wire on 5V and White wire on Sig(nal)


Step 6 – Plug in the Ultrasonic Sensor

step07

Plug the sensor into the breadboard – approximately centred left to right, but it is not critical

Then connect 4 of the 30cm Male-Female wires, ensuring you plug into the same 4 columns of the breadboard as the sensor is in


Step 7 – Wire the Ultrasonic Sensor to Microcon

step06

Ensure that the wires match the signal names printed on the sensor and the PCB. So:

  • Gnd -> Gnd
  • Echo -> Echo
  • Trig (or Ping) -> Ping
  • Vcc -> 5V


Step 8 – Wire in the Line Follower Sensors

step08

Again it is important that the voltage is the correct way round. Connect:

  • G -> Gnd
  • V+ -> +5V
  • S -> Sig

The Left sensor should be plugged into the 3 pins labelled 07

The Right sensor into pins labelled 11


Step 9 – Wire in the Battery Pack

step09

Very Important: The positive (Red wire) goes into the terminal marked Vin, and the negative (Black wire) into the terminal marked Gnd. If you get these the wrong way round, you will damage the driver chip.


Testing & Software

You have now completed the wiring of the Microcon onto the Unotron single-wheek robot. Please download the sample code to test it, remembering that you may need to swap the motor wires so forwards is forwards and not backwards. With the Pi powered up and connected to the internet, go into a terminal window (eg LXTerminal) or from the startup terminal if that’s how you run your Pi, then type (or copy and paste):

wget http://4tronix.co.uk/unotron.sh -O unotron.sh

When that is complete, type:

bash unotron.sh

Now you will have a new folder /home/pi/unotron with a library module and examples to try. Eg:

sudo python motorTest.py


Pan & Tilt Kit for Pi2Go-Lite and Pi Camera

Pan & Tilt Kit for Pi2Go and Pi2Go-Lite

pt01a


You can download a PDF of this guide from here

This system allows you to use the Pi Camera in 3 different ways with your Pi2Go or Pi2Go-Lite

  1. Fixed camera
  2. Camera with Pan control
  3. Camera with Pan and Tilt Control


All the parts are included in the kit for the complete Pan/Tilt assembly (except the Pi Camera which is an optional extra). You choose which system you want, and it is easy to change from one to another simply by undoing and replacing a few screws.


Step 1: Identify the Parts

pt04a

Included in the kit are the following parts:

  • 1 x Base mounting plate
  • 1 x Servo mounting plate
  • 1 x Camera mounting plate
  • 2 x Servo arm mounting plates
  • 2 x Tower Pro SG92R carbon fibre micro servos
  • 4 x M3 Self tapping 6mm screws (for attaching servo arms)
  • 4 x M2.5 screws 6mm (for mounting the servos)
  • 4 x M1.7 self-tapping screws 5mm (black, for mounting camera)
  • 2 x M3 male-female pillars 12mm
  • 1 x 200mm camera cable


Step 2: Solder the Camera Mount to a Servo Arm Plate

pt05a

  • Push the camera mount plate, with the camera markings on the inside as shown, into one of the servo arm plates
  • Tack solder in one place
  • Adjust the fitting until the camera mount is at right angles to the arm plate
  • Solder all the other places on both sides for maximum strength (in fact there is very little weight, so only a couple of points need soldering if you’re in a hurry!)


Step 3: Solder the Tilt Servo Mount to a Servo Arm Plate

pt07a

Make the tilt servo assembly in the same way as the camera mount assembly


Step 4: Attach the 12mm Pillars to the Pi2Go

pt08a

One at a time, remove the existing screws that hold on the front caster assembly on and replace them with the 12mm pillars.

Keep the screws for use in Step 6

Screw on firmly.


Step 5: Attach the Pan Servo to the Base Mounting Plate

pt09a

  • Push the servo through the hole in the base mounting plate  so the servo tabs are on the upper surface
  • Use 2 of the 6mm M2.5 screws to screw directly into the mounting holes of the servo from underneath


Step 6: Fit the Base Mounting to the Pi2Go

pt10a

Use the 2 screws you removed in step 4 to screw the base mounting plate

Attach  the straight servo arm using the small screw in the servo bag. Fit it so that it runs front to back as shown, when the servo is in its middle position


Step 7: Fit the Tilt Servo Mount Assembly to the Pan Servo

pt11a

Use 2 of the 6mm self-tapping screws provided. Do NOT use the 2 self-tapping screws in the servo bag as they are too long

The holes in the servo arm plate line up with the third hole out from the centre on each side of the servo arm.


Step 8: Fit the Tilt Servo into the Servo Mount

pt12a

This time, push the servo in from the back of the board and screw in using the last 2 of the 6mm M2.5 screws

Attach  the straight servo arm using the small screw in the servo bag. Fit it so that it runs top to bottom as shown, when the servo is in its middle position


Step 9: Fit the Camera to the Camera Mounting Plate

pt13a

Use the 4 very small black self-tapping screws to mount the camera. DO NOT TIGHTEN the screws at all. Leave them loose or you will bend and damage the camera board

You can mount it in 2 positions, as shown on the silk screen. When used with both Pan and Tilt, we find it is best to mount it in the orientation shown above.

Fit the 200mm camera cable carefully into the camera connector


Step 10: Fit the Camera Assembly to the Tilt Servo Arm

pt14a

Use 2 of the 6mm self-tapping screws provided. Do NOT use the 2 self-tapping screws in the servo bag as they are too long

The holes in the servo arm plate line up with the third hole out from the centre on each side of the servo arm.


You have now completed the assembly of the Pan Tilt mechanism.

Fitting Wheel Encoder Sensors to Pi2Go-Lite

Wheel Encoders on Pi2Go-Lite

You can also download a PDF of this guide from here

These simple encoders provide 16 pulses per revolution of the main wheels and allow you to program your vehicle to:

  • Travel in straight lines, even if the motors naturally move at slightly different speeds
  • Travel a fixed distance
  • Turn a set angle

The Pi2Go-Lite is already able to take the sensors. Both the Python library and ScratchGPIO incorporates the sensors and allows you to easily write your own programs to use them as you wish.

The encoder/sensors are supplied as a kit and require some soldering to complete.


Fitting the Encoder Sensors

Step 1: Identify the parts

** NB. Please check you have the correct resistors in the pack BEFORE soldering. We think there may be a few wheel sensor packs with incorrect resistors, so please double check first as it is much easier to resolve the problem before soldering. Specifically the 10K resistors may be incorrect, check they have Brown, Black and Orange stripes

encoders01a

Note: Check which Pi2Go-Lite main PCB you have as the instructions are slightly different

  • v1.0: The selection jumpers are not included with v1.0 and a cut needs to be made on a solder jumper to enable wheel sensors
  • v1.1: The selection jumpers and header is included with the base kit, so not separately required for the wheel sensor kit
  • v1.2: The base kit includes a slide switch to select line follower or wheel sensors, so not required in the wheel sensor kit


  • 2 x encoder discs (if this pack was ordered at same time as the Pi2Go-Lite, the discs will already be fitted to the wheels)
  • 2 x IR reflectance sensors
  • 2 x resistors 10K (Brown, Black, Orange)
  • 2 x resistors 220R (Red, Red, Brown)
  • 3×2 male jumper block: Not required for v1.1 and above
  • 2 x 0.1″ jumpers: Not required for v1.1 and above


Step 2: Attach the Wheel Encoder Discs

step04a

I prefer to use 5 drops of superglue – one on each spoke of the wheel. Then drop the encoder disc into each wheel as shown, with the black/white markings uppermost. Leave to dry while you get on with the soldering.

If you prefer, you can also use double-sided adhesive pads

Ff the wheel sensor pack was ordered at same time as the Pi2Go-Lite, the discs will already be fitted to the wheels


Step 3: Cut the Selector Tracks – v1.0 ONLY

step02a

** This step is only required for v1.0 PCBs

On the left of the Pi2Go-Lite is an empty position for the 3×2 male header block. To each side of that is a pre-linked solder jumper – click on the image above to enlarge and clarify. You need to cut these links carefully using a sharp craft knife. Be careful not to cut anything else!

When these links are cut and the jumper block added, then you can select whether to use line-follower sensors or wheel sensors. There are not sufficient available GPIO pins on the 26-0pin connector for both to be in operation at once.


Step 4: Add the IR Sensors

step03a

As when building the Pi2Go-Lite kit originally, you should cut the pins on the sensors, next to the flattened part on the legs. Then solder them on.

NB. The Blue LED for the left sensor is at the front, but the blue LED for the Right sensor is at the rear. Use the silk screen angles to identify.

Snip the plastic legs/fixings off the sensors, or these will impeded the mounting of the motors.


Step 5: Add the 10K Resistors (Brown, Black, Orange) – v1.0 Only ***

As shown in the image above, these need to be connected directly to the sensors on the top of the board.

Bend the legs on each resistor and cut off all but 4mm of the legs, then solder on carefully


Step 6: Add the 220R Resistors (Red, Red, Brown)

ws_step6

These can be soldered into the middle of the board in positions marked with an asterisk.

** For v1.1 PCBs and above, also fit the 10K resistors (Brown, Black, Orange) to the positions next to the 220R resistors


Step 7: Add the Jumper Block – v1.0 Only

step05a

** v1.0 only Ensure you have cut the 2 tracks as described in step 3. It is really difficult to cut the tracks after the jumper block is fitted.

Now solder on the 3×2 male jumper block.

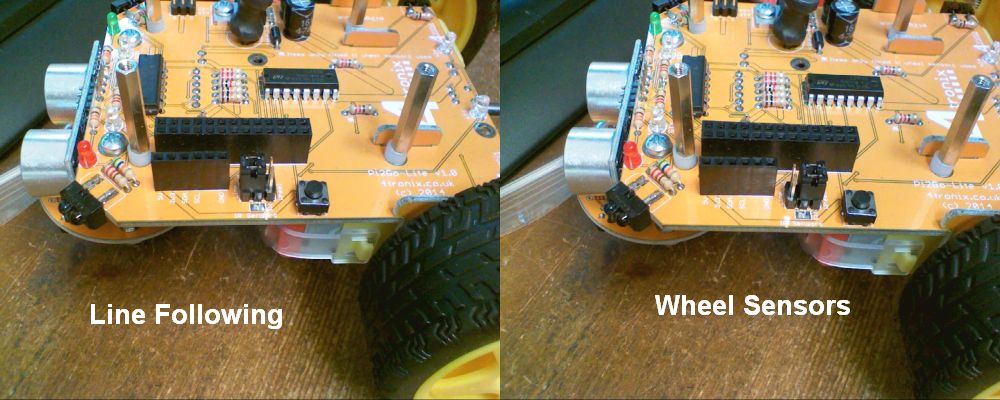
Important Info: The jumpers (or switch for v1.2 and above) can be placed in one of 2 positions:

  • Front: Use the line follower sensors
  • Rear: Use wheel sensors


The wheel sensors are now ready to go.


Programming PiRoCon in Python

Python

We have created a python library that makes programming PiRoCon and Initio very simple.

If you are using the PiRoCon on a different robot, you may need to change some of the pin assignments used, but the code itself should be fine

Raspberry Pi Python examples can be downloaded from an LXterminal session and connected to the internet, type in or copy and paste:

wget http://4tronix.co.uk/initio.sh -O initio.sh

Then type in:

bash initio.sh

You will then have a number of python examples to try. Run them with

sudo python filename.py
  • motorTest2.py:  use the arrow keys to move forwards and backwards, spin left or spin right. Space to stop. Use . and , to increase or decrease speed
  • sonarTest.py: Prints the distance in centimetres from the ultrasonic sensor, once every second
  • irTest.py: Prints the state of the IR line and obstacles sensors, every time the state changes.
  • servoTest.py:  use the arrow keys to pan and tilt

Python Software for Pi2Go

Python Software: Library & Examples

If you are setting up a new SD card, please follow the instructions in this PDF

We have created a python library module that allows you to use the same software to drive either the Pi2Go or the Pi2Go-Lite. Some functions can be directly mapped between the two products, but other functions will only work one one model or the other.

  • Download the latest version of the software using wget like this from a command line (eg. LXTerminal):
    wget http://4tronix.co.uk/pi2go.sh -O pi2go.sh
    bash pi2go.sh
  • This will create a new folder on your Pi in the /home/pi folder called pi2go
  • Run the example files using the following (example is for motorTest):
    sudo python motorTest.py
  • You need to use sudo as admin rights need to allow access to the GPIO pins

 **NOTE** The hardware driven servos used on Pi2Go (not Pi2Go-Lite) must be driven using the on-board servo and PWM driver chip shared with the RGB LEDs. See this Adafruit tutorial for driving servos with this chip as it is the same one used in their 16-channel PWM/Servo driver. The Pi2Go servos are on the top four pins of this chip (pins 12 to 15).

Library Functions:

#======================================================================
# General Functions
# (Both versions)
#
# init(). Initialises GPIO pins, switches motors and LEDs Off, etc
# cleanup(). Sets all motors and LEDs off and sets GPIO to standard values
# version(). Returns 1 for Full Pi2Go, and 2 for Pi2Go-Lite. Invalid until after init() has been called
#======================================================================

#======================================================================
# Motor Functions
# (Both Versions)
#
# stop(): Stops both motors
# forward(speed): Sets both motors to move forward at speed. 0 <= speed <= 100
# reverse(speed): Sets both motors to reverse at speed. 0 <= speed <= 100
# spinLeft(speed): Sets motors to turn opposite directions at speed. 0 <= speed <= 100
# spinRight(speed): Sets motors to turn opposite directions at speed. 0 <= speed <= 100
# turnForward(leftSpeed, rightSpeed): Moves forwards in an arc by setting different speeds. 0 <= leftSpeed,rightSpeed <= 100
# turnreverse(leftSpeed, rightSpeed): Moves backwards in an arc by setting different speeds. 0 <= leftSpeed,rightSpeed <= 100
# go(leftSpeed, rightSpeed): controls motors in both directions independently using different positive/negative speeds. -100<= leftSpeed,rightSpeed <= 100
# go(speed): controls motors in both directions together with positive/negative speed parameter. -100<= speed <= 100
#======================================================================
#======================================================================
# Wheel Sensor Functions
# (Pi2Go-Lite Only)
# stepForward(speed, steps): moves the unit forwards specified number of steps, then stops
# stepReverse(speed, steps): Moves backward specified number of counts, then stops
# stepSpinL(speed, steps): Spins left specified number of counts, then stops
# stepSpinR(speed, steps): Spins right specified number of counts, then stops
#======================================================================

#======================================================================
# RGB LED Functions
# (Full Pi2Go only)
#
# setLED(LED, Red, Green, Blue): Sets the LED specified to required RGB value. 0 >= LED <= 4; 0 <= R,G,B <= 4095
# setAllLEDs(Red, Green, Blue): Sets all LEDs to required RGB. 0 <= R,G,B <= 4095
#======================================================================

#======================================================================
# WHITE LED Functions
# (Pi2Go-Lite only)
#
# LsetLED(LED, value): Sets the LED specified to OFF == 0 or ON >= 1
# LsetAllLEDs(value): Sets both LEDs to OFF == 0 or ON >= 1
#======================================================================

#======================================================================
# IR Sensor Functions
# (Both Versions)
#
# irLeft(): Returns state of Left IR Obstacle sensor
# irRight(): Returns state of Right IR Obstacle sensor
# irCentre(): Returns state of Centre IR Obstacle sensor (Full Pi2Go Only)
# irAll(): Returns true if any of the Obstacle sensors are triggered
# irLeftLine(): Returns state of Left IR Line sensor
# irRightLine(): Returns state of Right IR Line sensor
#======================================================================

#======================================================================
# UltraSonic Functions
# (Both Versions)
#
# getDistance(). Returns the distance in cm to the nearest reflecting object. 0 == no object
#======================================================================

#======================================================================
# Light Sensor Functions
# (Full Pi2Go only)
#
# getLight(Sensor). Returns the value 0..1023 for the selected sensor, 0 <= Sensor <= 3
# getLightFL(). Returns the value 0..1023 for Front-Left light sensor
# getLightFR(). Returns the value 0..1023 for Front-Right light sensor
# getLightBL(). Returns the value 0..1023 for Back-Left light sensor
# getLightBR(). Returns the value 0..1023 for Back-Right light sensor
#======================================================================

#======================================================================
# Servo Functions
#
# startServos(). Initialises the servo background process
# stop Servos(). terminates the servo background process
# setServo(Servo, Degrees). Sets the servo (0 or 1) to position in degrees -90 to +90
#======================================================================

#======================================================================
# Switch Functions
#
# getSwitch(). Returns the value of the tact switch: True==pressed
#======================================================================

Pi2Go-Lite Released at CamJam 6th September 2014

Pi2Go-Lite Kits Released for Sale at CamJam

I went to the Cambridge Jam yesterday and was indundated with questions and people wanting to know more about the newly released Pi2Go-Lite kit for the Raspberry Pi. Now available for immediate shipping from here.

camjam01

I also did a brief presentation of the development process I have been through over the last 9 months or so – starting from a mock-up made from modelling board:

mockup01


And progressing through various prototypes to the final full Pi2Go prototype:

finalproto01


Following this prototype, we forked the project so that the full Pi2Go would be manufactured as a fully soldered mainboard using surface mount components and the Pi2Go-Lite would be a reduced feature-set product that could be hand-soldered using surface mount components.


Pi2Go (Full) Update

Now the Pi2Go-Lite kit has been released and the full Pi2Go is about to go for CE testing at an independent lab. Once these tests are passed, we can move to full production. It looks like it will be at least 6 weeks from now.


Pi2Go is now a Registered Trademark

When I arrived home from the Cambridge Lam, I found a letter containing the registration certificate for the Pi2Go trademark. Excellent timing!

pi2go-cert0002


PicoCon – “No Frills” Motor Controller

IMG_0384a

Picocon – The “No Frills” Motor Controller

Purchase Here


Scroll down for the assembly information for v1 of Picocon (Yellow PCB)

Assembling your PicoCon

1. Check You Have Everything

IMG_0364b

  1. PCB (Red)
  2. 3 x Screw Terminal Blocks
  3. Dual H-Bridge Chip
  4. 100nF capacitor
  5. Diode
  6. 6-pin female header
  7. 10-pin female header
  8. 26-pin female (GPIO) header


2. Start with the Diode

Step02

Ensure that the white line on the diode is facing the bottom as shown in the photo above. Solder it carefully then snip the leads off underneath


3. Add the Capacitor

Step03

This can be placed either way round. Mount it close to the PCB as shown


4. Add the H-Bridge Chip

Step04

This must be placed the correct way round or it will be damaged. Check the orientation twice before soldering!

The writing ion the chip should be correct way up when viewed as in the photo above. The little ‘U-shaped’ notch should be on the left

Click on the image above to enlarge it to see the orientation more clearly


5. Add the 2 Female Headers

Step05

It is a good idea to add these both at once as the board will rest on them on your desk fairly firmly.

Solder just one pin on each initially. Then pick up and for each header, melt the solder again while holding the header and move it until it is straight and level.

Then solder the remaining pins. It is difficult to straighten them up after more than one or two pins have been soldered, so do it at the beginning.


6. Add the 2-pin Screw Terminals

Step06a

As with the female headers, add them all together so the board rests on them when soldering the first pin of each

Straighten them out before soldering the second pin, in the same way you did for the female headers


7. Finally add the GPIO Header

Step07a

Make sure you add it on the bottom of the board!

Again, just solder one pin at each end then adjust until it is straight. Then solder the remaining pins

Step07b

Your board should now look like this


Software for your PicoCon

1. Basic python software

  • Each motor is directly controlled by two pins, each of which drives one side of the motor
  • To make the motor go forwards, you make one pin high and the other pin low
  • To make it reverse, you make the first pin low and the second pin high
  • For the robot to go forwards both motors should be set to forwards
  • Similarly to go backwards, both motors should be set to reverse
  • If you set the left motor to forwards and the right motor to backwards, the robot will spin right
  • The (physical) pins for the left motor are 19 and 21
  • The (physical) pins for the right motor are 24 and 26
  • So to make the left motor go forwards, set pin19 high and pin21 low. You can do this in python with:
    GPIO.output(19, 1)    # pin 19 is left motor A
    GPIO.output(21, 1)    # pin 21 is left motor B

This is covered in a complete python program picoTest01.py covered below.

2. Using the supplied python library

  • You need to import the library at the start of your python program
    import picocon
  • Then you can use the pre-defined functions for moving the motors:
  • init(). Initialises GPIO pins, switches motors off, etc
  • cleanup(). Sets all motors off and sets GPIO to standard values
  • stop(): Stops both motors
  • forward(speed): Sets both motors to move forward at speed. 0 <= speed <= 100
  • reverse(speed): Sets both motors to reverse at speed. 0 <= speed <= 100
  • spinLeft(speed): Sets motors to turn opposite directions at speed. 0 <= speed <= 100
  • spinRight(speed): Sets motors to turn opposite directions at speed. 0 <= speed <= 100
  • turnForward(leftSpeed, rightSpeed): Moves forwards in an arc by setting different speeds. 0 <= leftSpeed,rightSpeed <= 100
  • turnReverse(leftSpeed, rightSpeed): Moves backwards in an arc by setting different speeds. 0 <= leftSpeed,rightSpeed <= 100
  • To use these functions, you need to preface them with the name of module, picocon.
  • You need to call the function init() at the start of your program to setup all the input and output pins
    picocon.init()
  • You must call the cleanup() function at the end to put all the input and output pins back to where they were
    picocon.cleanup()
  • In between you can do whatever you want, so to make the robot go forwards at a medium speed:
    picocon.forward(50)
  • to spin left at a fast speed
    picocon.spinLeft(100)

Downloading the Software Library and Examples

  1. Make sure the Pi is connected to the internet
  2. From a terminal window on your Pi type the following lines exactly:
    wget http://4tronix.co.uk/picocon.sh -O picocon.sh
    bash picocon.sh
  3. This will create a new folder on your Pi called picocon
  4. Go into this folder and then you can run the examples like this:
    sudo python picoTest01.py
  5. picotest01.py simply goes forwards, backwards, spins right and left in a loop. Press Ctrl-C to exit
  6. picotest02.py does the same thing but using the library (see how much simpler the code is)
  7. picotest03.py uses the arrow keys on your keyboard to move the robot. You can also use . or , to speed up and slow down the robot. Also use space to stop

—————————————————————–

Following information for Picocon v1 (Yellow)


step07a


The PicoCon is a very basic “No Frills” motor controller that lets you get going with robots very quickly and simply.


Assembling your PicoCon

1. Check You Have Everything

step01

The are only 7 components to solder to the PCB:

  • L293D Dual H-Bridge chip
  • 3 x Screw Termianls 2-pin
  • Capacitor 100nF
  • 6-way Female Header
  • GPIO Header (short and long pin are provided – select which one to use)


2. Solder in the L293D

step02

Solder the main IC – make sure pin one is in the correct place and do NOT spend too long with the soldering iron held against a pin as it may damage the chip. 2 to 3 seconds at most


3. Add the 100nF Capacitor

step03

Add the small capacitor. It doesn’t matter which way around this goes


4. Fit the Screw Terminals

step04

Then add the 3 screw-terminal blocks for the 2 motors and the motor power


5. Fit the 6-Pin Female Header

step05

Connect the 6-pin I2C breakout connector (Very useful if you want to plug in the IP Display so you know the IP address of your robot)


6. Select the GPIO Header to use

step06

If you use the extended header, then it allows you to easily access the GPIO pins not used by the Picocon itself. However, it then makes the Picocon very easy to short out and much more delicate. Choose wisely!


7. Attach the GPIO Header to the UNDERSIDE of the PCB

step07a

step08

Finally solder the GPIO head to the REVERSE SIDE of the board. Once on, it is very difficult to remove. So make sure you get it right


Pi2Go Update – 26th August 2014

Just a quick update covering price revision (sorry), availability (hurrah!), some news and a little teaser (hehe)


Price Revision

Having looked closely at the price we planned to sell the Pi2Go-Lite at it wasn’t viable for a long-term business. Therefore the release price has been revised to £35.95+VAT

This still represents great value and you get an awful lot of bot for your money.

We have not changed the price of the full Pi2Go which remains at £60.00+VAT


Availability

At the Cambridge Raspberry Jam on 6th September, we will have a small number of Pi2Go-Lite kits available for immediate purchase at a great one-off price. Anyone at the Raspberry Jam will be able to pick one up and take it home on the day (while stocks last).

On the day following the Cambridge Jam, the Pi2Go-Lite will be released for purchase on line – link for purchase will be here on www.pi2go.co.uk

Also, the full Pi2Go (subject to some test results) will be available for pre-order with expected delivery end-September or early October.


Pi2Go News

We have sent the Pi2Go for CE testing. This is important and we must pass these tests before we can claim CE compliance. If there is a problem with the testing, then we may have a delay to shipping. I’ll let you know what happens and whether we can still start taking pre-orders, as soon as I can.


Teaser

The Pi2Go kits that are being released have nearly been complete. The final part was to receive the release PCBs, which arrived yesterday (Thank you DHL – delivering on a bank holiday!). They tested fine and are now being put into the kits ready for the release date in a week and a half.


There is a new feature. This does not come as standard and you will have to purchase the addon separately. Code is being written now to use the new feature in both python and ScratchGPIO. This will make the Pi2Go-Lite even more awesome, especially for PiWars! All will be revealed at the Cambridge Jam


Pi2Go Home Page

Pi2Go and Pi2Go-Lite

cf01

NOTE: Pi2Go and Pi2Go-Lite are different products with different assembly and usage instructions

Video Tutorials from The Raspberry Pi Guy

Downloadable PDF Guides


Online Guides

News Postings


Specifications


Pi2Go

Pi2Go-Lite

Main PCBA dimensions (mm)

110 x 80

100 x 80

PCBA Colour

Red

Yellow

Component technology

Surface Mount

Through Hole

Assembly method

Fully soldered

Requires Soldering

Supports Model A, B and B+

Yes

Yes

Power Supply

6 x AA

6 x AA

5V Regulator

3A Switching

3A Switching

Battery Monitoring

Yes*

–

Light sensors

4 x analog

–

RGB LEDs

4 pairs, hardware PWM

–

White LEDs

–

2 front, 2 rear (paired, s/w PWM)

Ultrasonic sensor

Yes

Yes

Line sensors x 2

Yes

Yes

IR obstacle sensors

3 with anti-glare technology**

2

Wheels

65mm Yellow

65mm Yellow

Servo connections

4 (Hardware PWM)

2 (Software PWM)

I2C Breakout connector

Yes

Yes

LED indicators for IR sensors

Yes

Yes

Geared motors ratio

120:1

120:1 or 48:1

Motor connection

Plug & Socket

Screw terminal

Power connection

Plug & Socket

Screw terminal

Time to Build (approx/varies)

20 minutes

90 minutes***


Notes:

*  Battery monitoring circuit continuously checks that the battery levels is sufficient to power the motors and the Raspberry Pi. If it starts getting low, then it disables the motors and IR sensors, and flashes the Red LED. If it gets even lower then a signal is sent to the Raspberry Pi which can be used to shut down the Pi gracefully, and sets the Red LED on solidly. This function can be over-ridden by changing jumper SV1 (on the right side of Pi2Go) from “CTRL” to “ON”.

** “Anti-glare technology” prevents false triggers in bright sunlight. However the sunlight can still swamp the IR system which can prevent any events being received

***  90 minutes is estimated based on 1 hour to solder the PCBs and 30 minutes to assemble. Depending on soldering speed and ability, this can vary widely. “Your mileage may vary”

Soldering and Assembling Pi2Go-Lite

Soldering Pi2Go Lite

You can also download a PDF version of this guide here

First check which version of the main PCB you have. It is marked above the left motor “Pi2Go-Lite v1.x”. There are minor changes to some parts of the build.

  • v1.0 (initial release) – Yellow
  • v1.1 (from 20th October 2014) – Yell0w
  • v1.2 and later (from 15th November 2014) – Orange

Soldering the Line-Follower PCB
step01

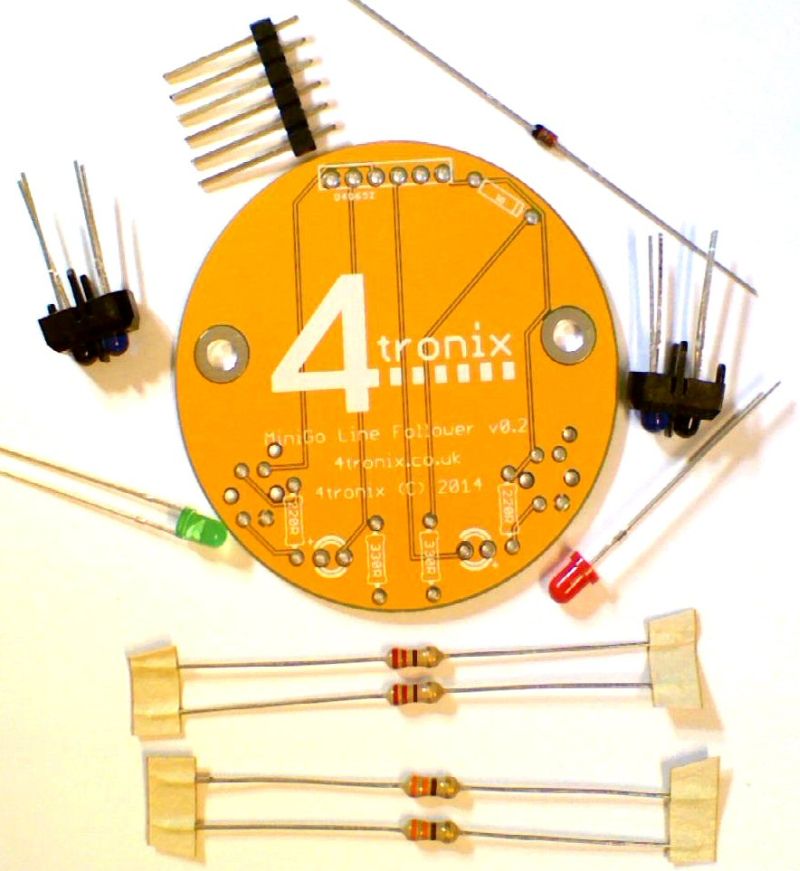
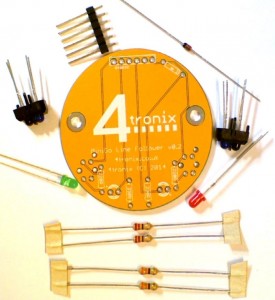
1. Check you have the correct parts

  • PCB
  • 2 x 330R resistors (Orange, Orange, Brown)
  • 2 x 220R resistors (Red, Red, Brown)
  • Diode
  • 2 x LEDs (Green & Red)
  • 2 x IR reflectance sensors
  • 6-pin male header


step02

2. Solder the diode – black line away from the connector
 

step03

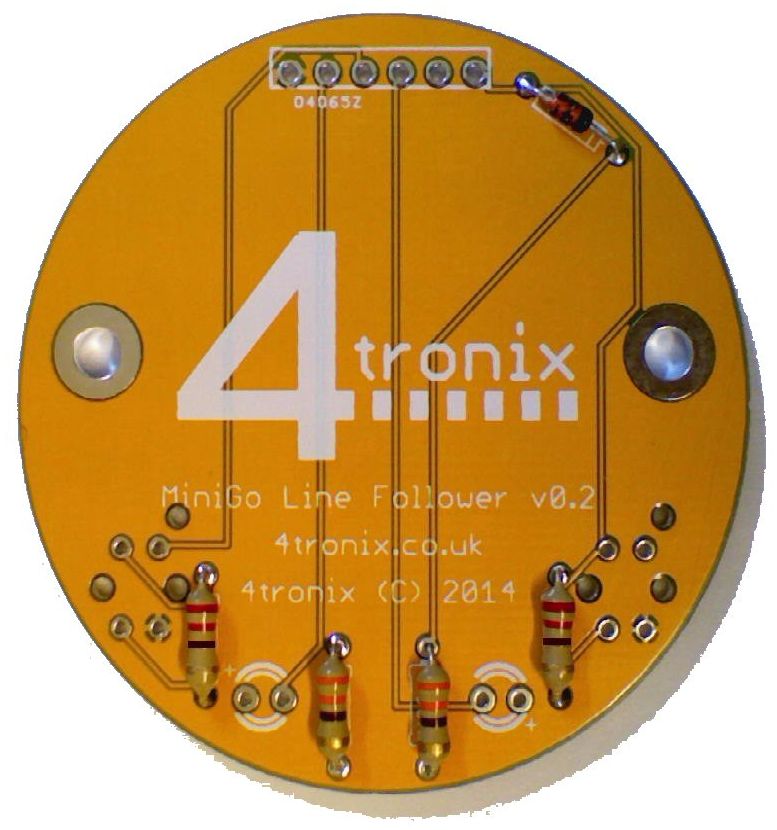
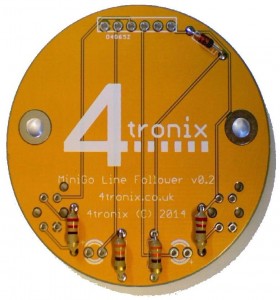
3. Add the resistors.


step04

4. Add the LEDs. Long leg next to the + sign on the silk screen (ie. long leg away from centre of PCB)
 

step05

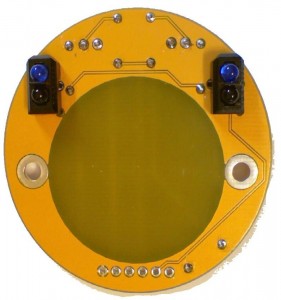
5. Add the reflectance sensors to the bottom of the PCB. Blue LED at the edge of the board as shown
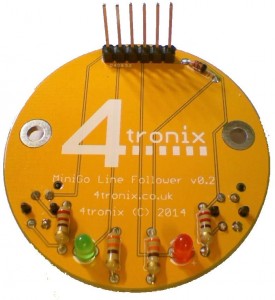
 

step06

6. Solder the male header to the top of the board. Ensure it is soldered perfectly vertical


Now to solder the main PCB
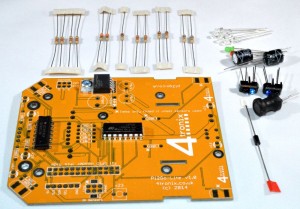
step07

7. First ensure you have all the parts:

  • Main PCB with motor driver, schmidt trigger and voltage regulator fitted
  • 4 x 220R resistors (Red, Red, Brown)
  • 2 x 330R resistors (Orange, Orange, Brown)
  • 1 x 1K resistors (Brown, Black, Red)
  • 2 x 2K2 resistors (Red, Red, Red)
  • 2 x 10K resistors (Brown, Black, Orange)
  • 2 x 56K resistors (Green, Blue, Orange)
  • Diode 1N5817
  • 2 x 470uF capacitors
  • 6 x LEDs (Green, Red, 4 x White)
  • 100uH coil
  • Ultrasonic sensor
  • 2 x IR reflectance sensors
  • 2-pin mini tact switch
  • Toggle switch
  • 3×2 male header (2 of these for v1.1)
  • 2 x 6-pin female headers
  • 26-pin GPIO header
  • 3 x 2-pin screw terminals
  • 2 x 0.1″ 2-pin jumpers (v1.1 only)
  • 2 x 100nF capacitors – small yellow blobs with long legs! (v1.1 only)
  • 1 x miniature slide switch (v1.2 only)
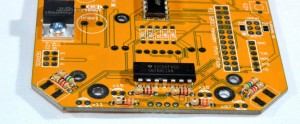
 

step08

8. Add the resistors near the front of the board. The silk screen shows the value. It doesn’t matter which way they go but it is tidier to keep a standard orientation

** For v1.1 and later, also add the two 100nF capacitors at either end of the IC in photo above
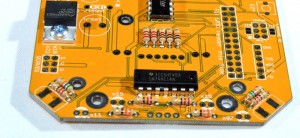
 

step09

9. Add the resistors in the block near the motor driver chip. For tidiness, keep all the gold bars at the same end
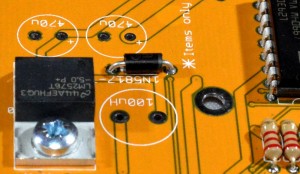
 

step10

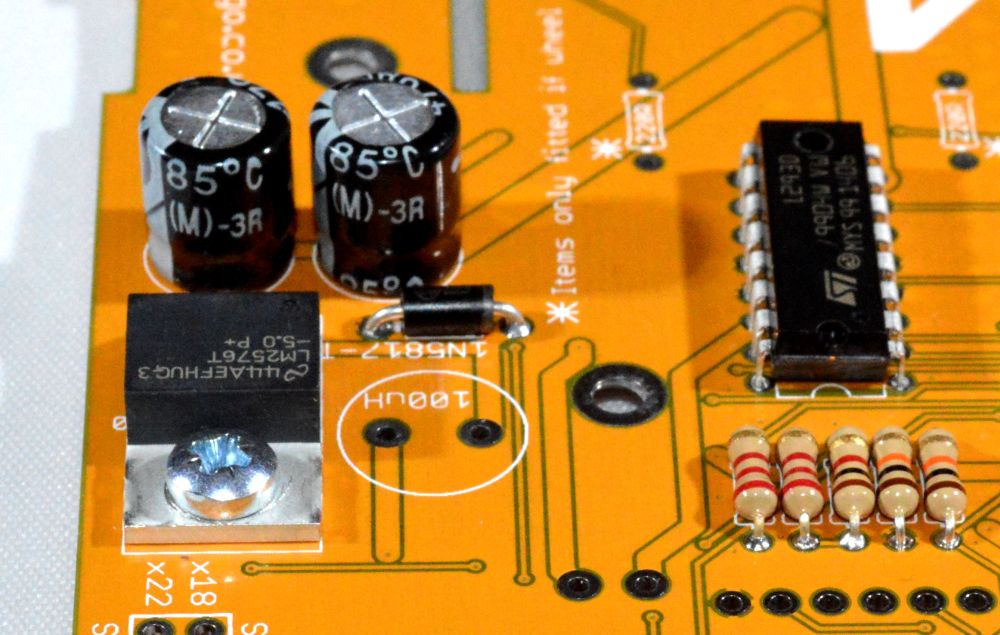
10. Add the 1N5817 diode. Ensure the silver stripe is towards the centre of PCB
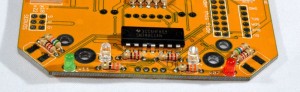
 

step11

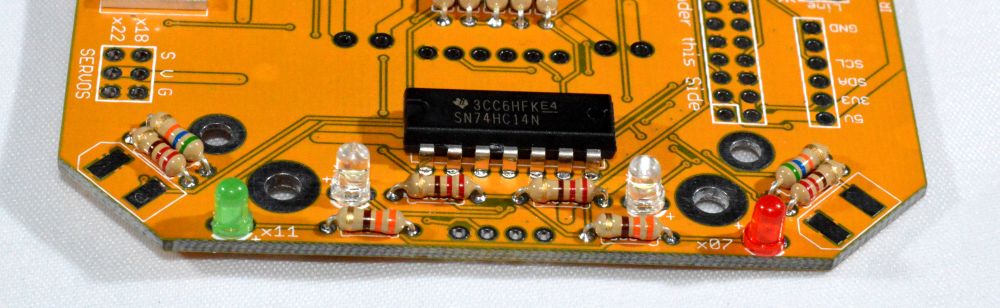
11. Add LEDs at front of board. Red is for port (as in the wine), left. Green for starboard, right. And 2 white LEDs.

Ensure that the long lead of each LED goes into the position marked with a +  (on v1.0 the + sign has missed the edge of the board and can only just be seen, v1.1 and later are OK)
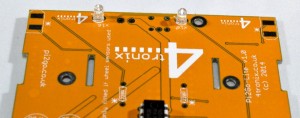
 

step12

12. Add the 2 white LEDs at the rear of the board, again ensuring long lead into the +
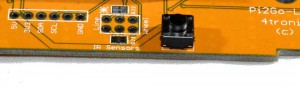
 

step13

13. Add the 2-pin tact switch


step14

14. Add the two 470uF capacitors ensuring long lead towards centre of board (grey strip on case towards outside of board)

Keep the 100uH coil to one side as it is better to leave this until last as it is quite tall


Now open the bag of headers and switches:
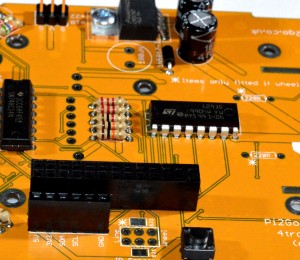
step15

15. Add the three headers:

  • 6-pin female header for I2C breakout (bottom left of photo)
  • 3×2 male header for servos (top left of photo)
  • ** For v1.1 also add a 3×2 male header in the position at the bottom centre of above photo
  • 26-pin GPIO header
  • For v1.0, note that the lower 3×2 header is not used unless the wheel encoder add-on pack is fitted
  • ** For v1.1 add the 2 blue jumpers in the leftmost positions for line followers, or rightmost positions for wheel sensors
  • ** For v1.2 we have replaced the 3×2 headers and 0.1″ jumpers with a miniature slide switch as shown below
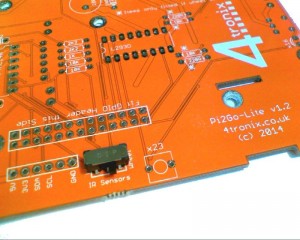
v12_switcha

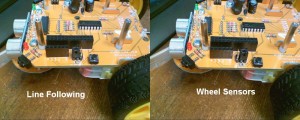
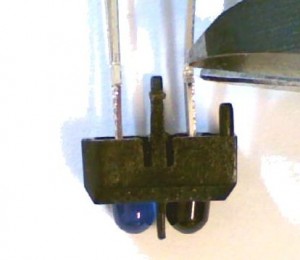
The position of the jumpers (v1.0 and v1.1) should be as shown below. Put both jumpers to the left for line following, and to the right for wheel sensing. Note that the jumpers should be aligned along the length of the Pi2Go-Lite, not across the board.
SensorSelection


step16

16. Snip the 4 leads on each reflectance sensor at the position shown
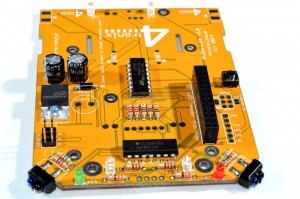
 

step17

17. Solder the sensors in the front corners. Ensure you solder the top and the bottom of the board and that the blue LED is to the left as looking at the photo above

Note: If you are using the wheel sensors, now is a good time to head over to the build instructions for wheel sensors
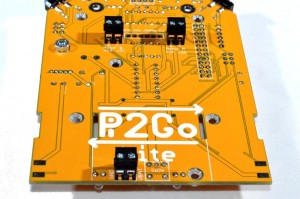
 

step18

18. Add the three 2-pin terminals to the bottom of the board. Connector holes should face to the rear of the board as shown above
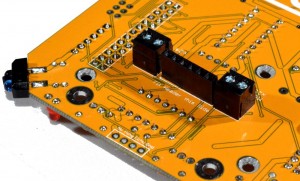
 

step19

19. Add the 6-pin female connector to the bottom of the PCB. Ensure that it is mounted perfectly vertical as it is used to connect to the line follower board. Solder one pin, then adjust the position with one hand whilst keeping the solder melted with the other. 3 hands helps here!
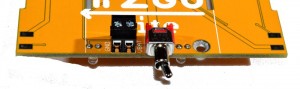
 

step20

20. Add the toggle switch to the underside of the PCB at the rear. This is the On/off switch
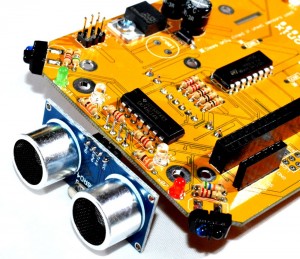
 

step21

21. Solder the ultrasonic sensor board to the bottom of the board, facing forward. Ensure it is fully inserted and horizontal.

NOTE: Sometimes we receive a batch of ultrasonic sensor modules where the header is on the same side as the sensors. Do NOT fit these. Contact us immediately for a replacement. If these are fitted, they will interfere with the mounting pillars and may cause a short-circuit.
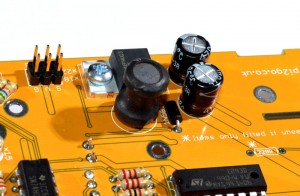
step22

22. Finally solder the coil in place

The PCB is now fully soldered.


Soldering the Motor Wires & Capacitors

Notes – Please read:

  1. It is very important to add at least one capacitor between the two terminals of each motor. This removes about 70% of the electrical noise produced by the motor. Another 20% can be removed by adding 2 capacitors, one from each terminal to the case. This is trickier to do, so leave off if you are not sure about it. When we solder the kits, we add all three capacitors as shown below
  2. The Red wire and Black wire should be connected as shown, or the motors may run backwards in the example scripts


Motor Step 1 – Identify the Parts
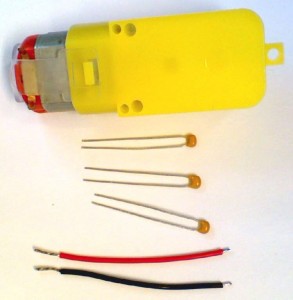
motor01

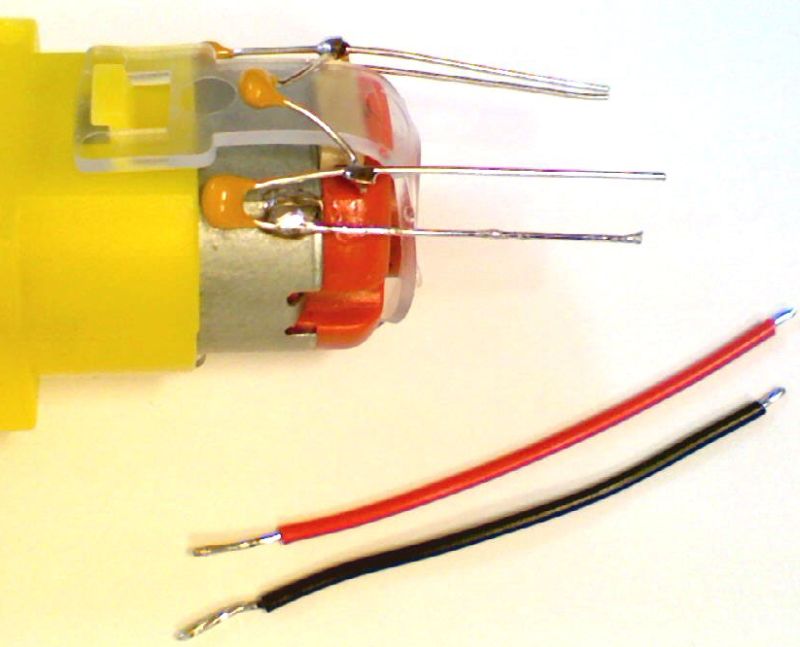
For each motor we provide 1 capacitor, a red 5cm lead and a black 5cm lead. You can optionally add 2 more capacitors for that extra noise reduction


Motor 2 – Add Main Capacitor
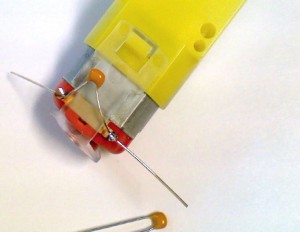
motor02

Feed a capacitor through the metal terminals and solder as shown. It doesn’t matter which way round it is fitted.

Then clip the leads short – being careful not to clip off the motor terminals
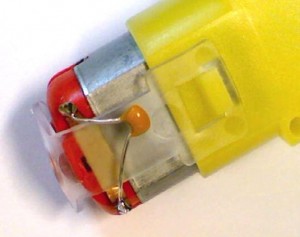
motor03


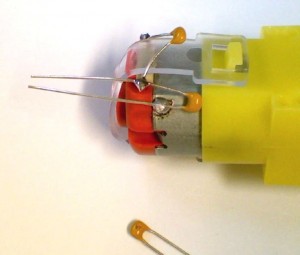
Motor 3 – Add Second & Third Capacitors (Optional – not provided)
motor04 motor05

If required, the other 2 capacitors should be soldered between one motor terminal and the metal case, as shown above. You will need a hot iron to heat up the case sufficiently to melt the solder. Also, the motor case can become oxidised over time making it very difficult to solder to. Some “wet and dry” sand paper can be used to brighten up the metal if required.

Then clip the leads short:
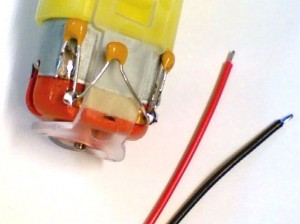
motor06


Motor 4 – Add the Wires

motor07

  1. Each wire has a short end and a long end. The short end should be soldered to the motor
  2. Solder the Red wire to the top terminal and the Black wire to the bottom terminal, as shown above. If you solder them the other way round the Pi2Go-Lite will run backwards.


Assemble the Pi2Go-Lite

You could watch the one minute assembly video here but note that some things are slightly different from this released version
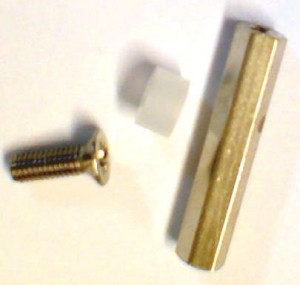
step22

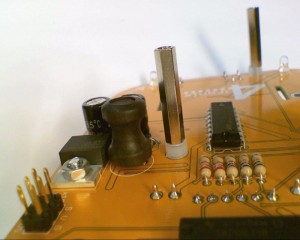
For each Raspberry Pi mounting position you will need a 20mm M2.5 pillar, an 8mm countersunk screw and a 3mm spacer.

For the Model B you will require 2 sets, and for the Model B+ you will require 4 sets
step23

Here we have mounted 2 pillars in the correct positions for a Model B. Screw the countersunk screw through the PCB from the bottom, through the spacer and into the 20mm metal pillar.
 

bld01

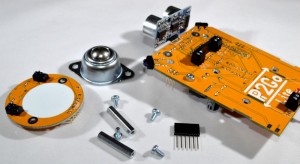
Prepare the line follower PCB, the 4 M3x6mm screws, the 2 M3 25mm pillars, the ball caster and the 6-pin female header
 

bld02

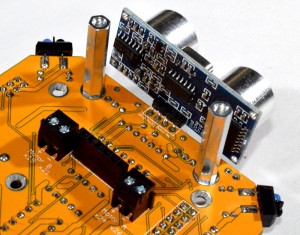
Screw the 25mm pillars into the main PCB using 2 of the 6mm M3 screws
 

bld03

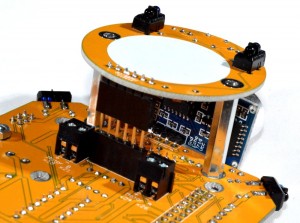
Push the female header onto the male header on the line follower board, then push the completed assembly into the female header on the underside of the main PCB. The holes in the line-follower PCB should then line up with the pillars and the line follower board should lie flush with the top of the pillars
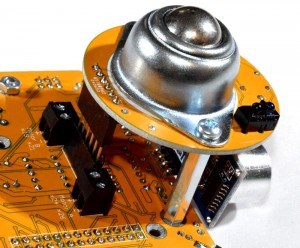
 

bld04

Use the 6mm M3 screws to screw through the ball caster, through the line follower PCB and into the pillars
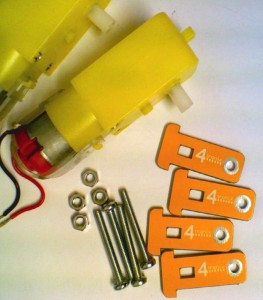
 

step29

Prepare the items required to mount the motors:

  • 2 motors with wires and capacitors ready soldered
  • 4 motor mount PCBs
  • 4 M3x25mm screws
  • 4 M3 nuts

step30

Push the motor mount PCBs from the top of the main board so that the holes line up with the mounting holes in the motor. Pass the 25mm screws from the outside, through one mount, through the motor and then through the second mount. Screw into the M3 nuts on the inside. Repeat for both motors.
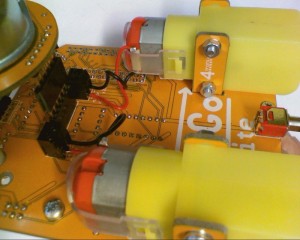
 

step31

Red wires should be screwed into the terminals marked with a +, and the black wires into terminals marked with a -. This gives a Red – Black – Red – Black arrangement
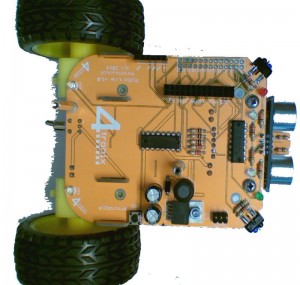
 

step32

Push the wheels on now as it makes the unit more stable. Your Pi2Go-Lite should look like this


step33

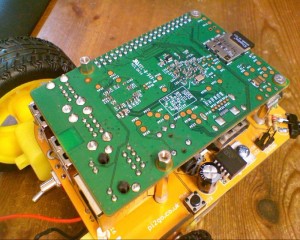
To mount a Model B you will need an extended GPIO header and 2 x 5mm male-female pillars.

To mount a Model B+ you will need also need 2 x 4mm countersunk screws. For the B+ use the screws for two front mounts and the 5mm male-female pillars for the two rear mounts.
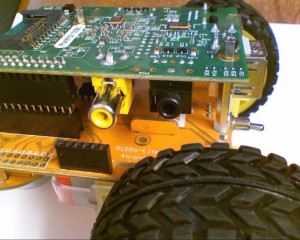
 

step34

Above: Model B mounting

Below: Model B+ or RPi 2B Mounting (2 x 5mm pillars at the rear)
ModelB-Plus_01


Push the extended header into the GPIO header on the main PCB, then carefully push the Raspberry Pi onto the extended header. Ensure that the mounting holes in the Pi match the pillars. If not, check that the GPIO header is plugged into the correct position.
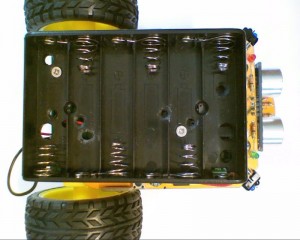
 

step36

Above: Model B Battery Holder Mounting

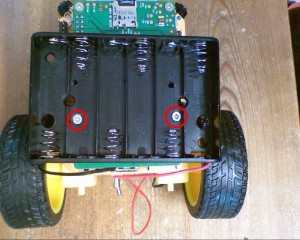
Below: Model B+ or RPi 2B Battery Holder Mounting
ModelB-Plus_03

Now use 2 4mm countersunk screws to fit the battery holder into position, screwing into the 5mm male-female pillars that hold the Pi. For the Model B, the battery holder is mounted as shown above. For the Model B+ it is mounted cross-wise near the rear of the unit and offset, to allow access to the 6-pin I2C breakout header
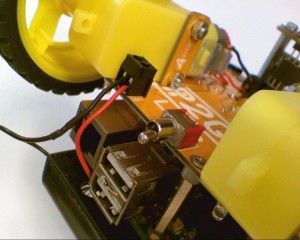
 

step37

Fit the red wire from battery holder into the position nearest the switch – marked VBAT. The black wire goes into the position next to the motor.
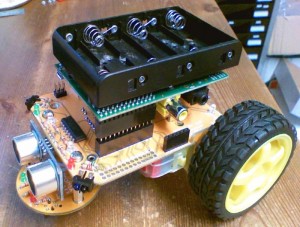
 

step38

Your Pi2Go-Lite is now Complete!