Purchase >HERE<
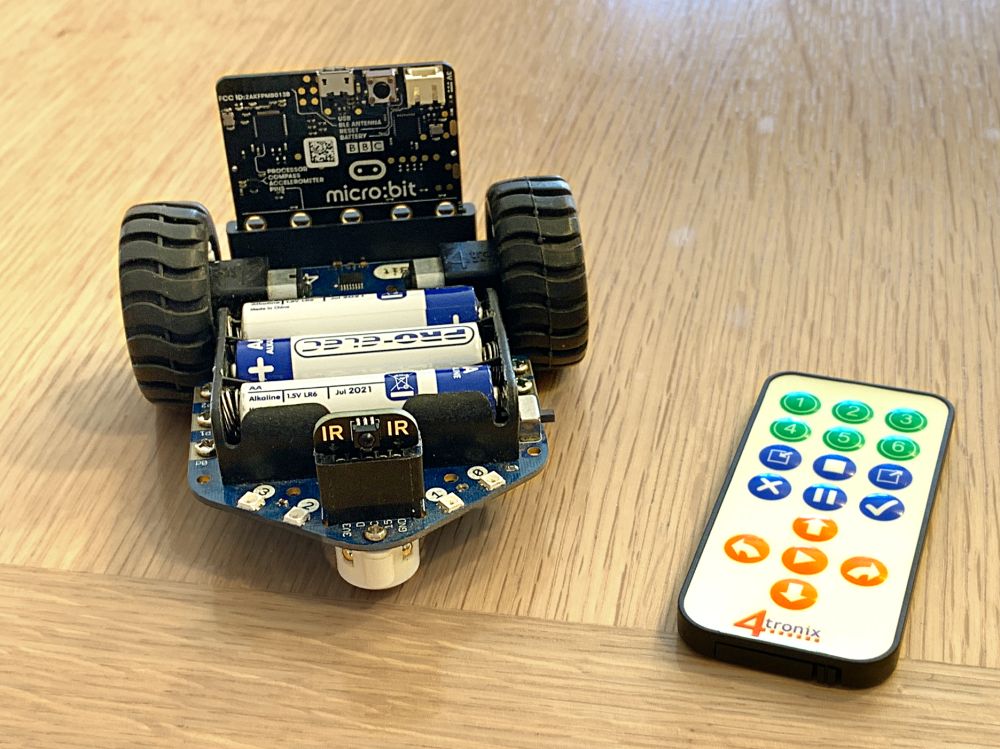
The 4tronix infrared keypad and receiver works with MiniBit, BitBot XL and Robobit Mk3 robots. Simply plug the IR Receiver dongle into the front interface port of the robot, with the sensor pointing forwards. Then remove the clear plastic battery tab from the keypad and you’re ready to go. Here is one fitted in a MiniBit.

Programming
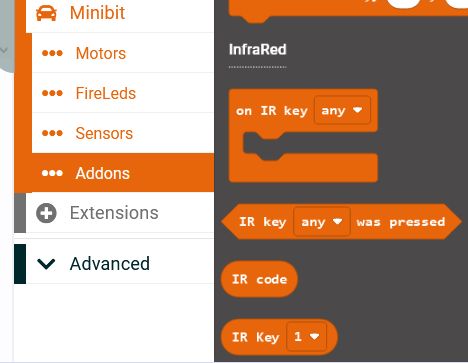
You can find the InfraRed blocks in the Makecode extension for your robot, in the category “Addons”.
The IR receiver is very easy to use in your program. You can set up as many different event blocks as you need; one for every key on the keypad if you want. Each event block will be run when the selected key on keypad is pressed. You can also have an event block that is triggered by any of the keys being pressed, then decide in the block what to do based on the specific key that was pressed. This is useful in some scenarios.
Note that the keys on the keypad are labelled with numbers and symbols, but you can use them to do whatever you need. There is no specific mapping between the keys on the keypad and what you do with that information in your program. You could use the “up arrow” key to spin 90 degrees left if you want.
Note also that there is no pairing between the infrared keypad and the receiver in the robot. Any receiver that “sees” the message from the keypad can respond to it. This is great if you want multiple robots to start dancing at the same time for instance. On the other hand, in a classroom environment you probably don’t want all the robots to be controlled from a single keypad. It isn’t really that bad though, because the keypads are fairly directional and the range isn’t very far, so you could point the keypad at a particular robot and reasonably expect only that one to respond.
There are 4 Makecode Blocks for the InfraRed, as shown below

This is an example of a single key triggering an event block:

Here we have selected the “Up arrow” and when that is pressed, a Rainbow display is shown on the Fireleds and the robot moves foward 30cm
In this example we trigger the block on any key being pressed, then check inside the block to see which key was actually pressed:

We select the “any” key and then use if..then blocks to run the options. This allows us to do something that is common to all the functions in just the one place – in this case, “set LED rainbow”. You can also use the “if key was pressed” blocks within a loop to exit – for instance, in one of the line following loops to stop it moving.
