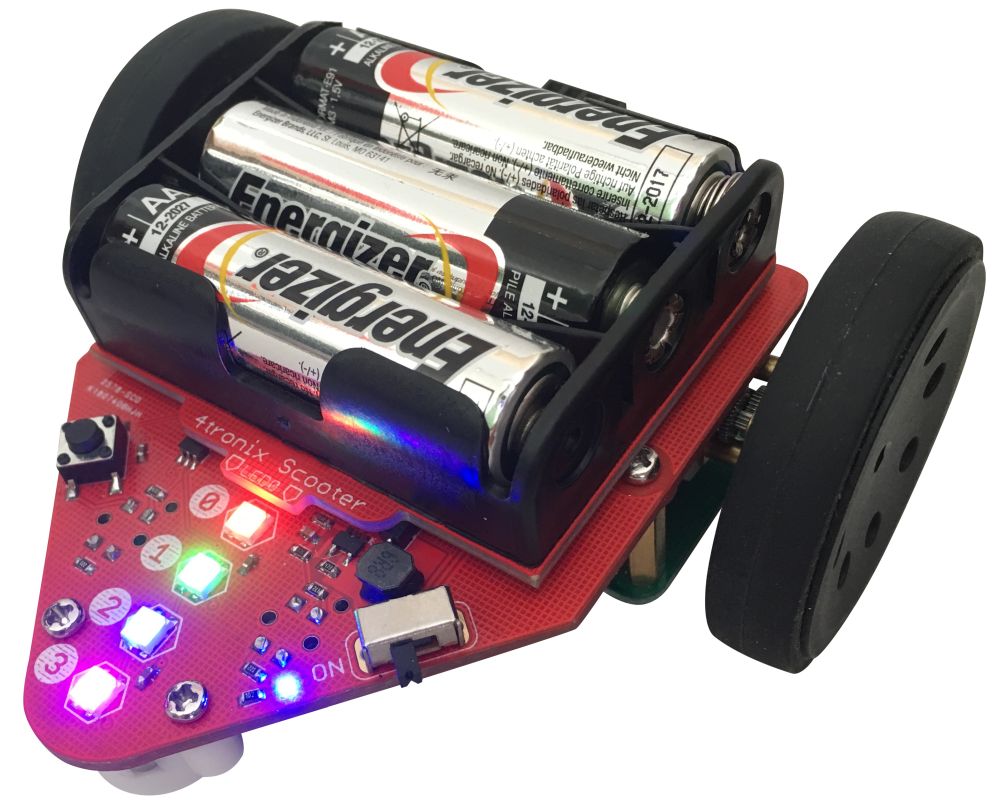
Scooter Robot for Raspberry Pi Zero
Purchase Scooter
Assembly
Step 1 – Check you have all the parts

- Main board with attached battery holder
- 2 x wheels
- 2 x 16mm pillars
- 4 x screws
- Female header
Step 2 – Remove the Battery Holder

Unscrew the battery holder, taking careful note of which way it is fitted
Step 3 – Fit the Raspberry Pi Zero
NB. You need to have a Pi Zero with the headers fitted. Model Zero WH is recommended
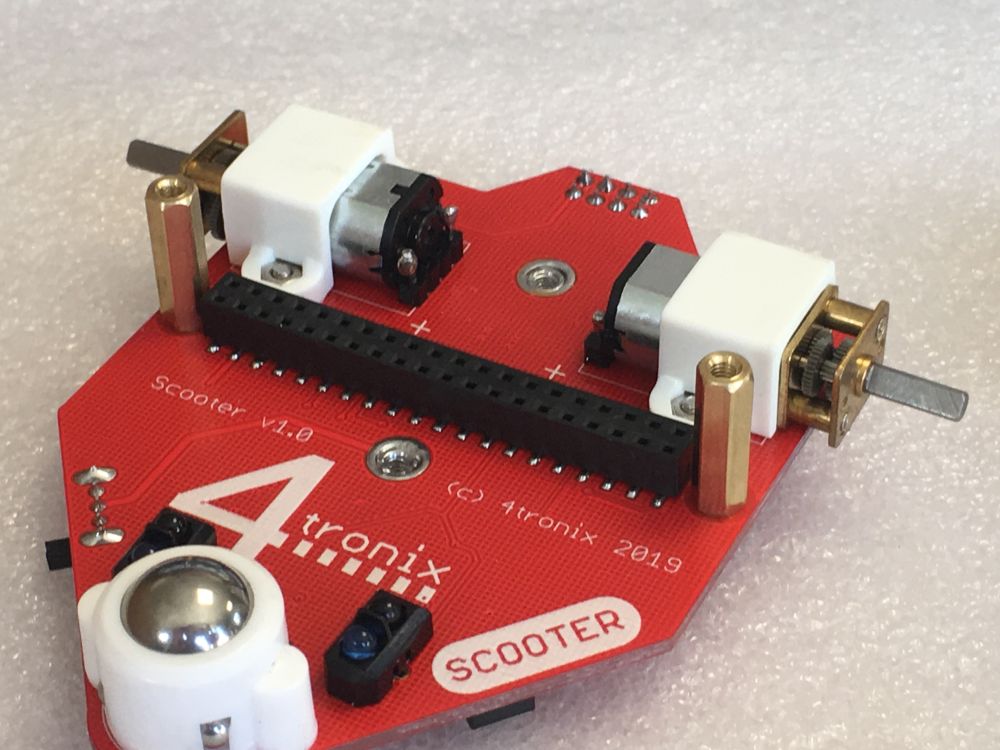
Screw the 16mm pillars onto the main board

Push the included female header into the low-profile header on the main board
Fit the Pi Zero to the header, with the Pi Zero sitting over the motors as shown below

Screw the Pi Zero onto the headers so it doesn’t fall off in use
Step 4 – Complete the Assembly
Refit the battery holder

Push on the wheels
Add batteries
Start coding…
Coding for the Scooter
Install the software
First you will need to prepare your Pi for the Smart RGB LEDs (fully compatible with neopixels). The best way we’ve found to do this is run Pimoroni’s curl script.
With your Pi connected to the internet, run (you don’t need to install the resources and examples):
curl -sS https://get.pimoroni.com/unicornhat | bash
Then install the Scooter software:
wget https://4tronix.co.uk/scooter.sh -O scooter.sh
bash scooter.sh
This installs the following files:
- scooter.py the main library module
- motorTest.py Use the arrow keys to control the motors. Use . and , to speed up and slow down after next arrow press. Press space bar to stop slowly and ‘b’ to brake quickly
- ledTest.py Sets the Smart RGB LEDs to Red, Green, Blue, White in turn. Run with sudo python ledTest.py
- lineTest.py shows the states of the line follower sensors
- sonarTest.py gives the distance in cm to an obstacle using the optional HC-SR04P
- avoider.py is a simple obstacle avoider. Run with sudo python avoider.py
- lineFollower.py is a simple line follower. This runs the Scooter backwards and is best with lines printed from RobotSquare.