Assembly Instructions for Pi2Go Mk2
Click any image to enlarge
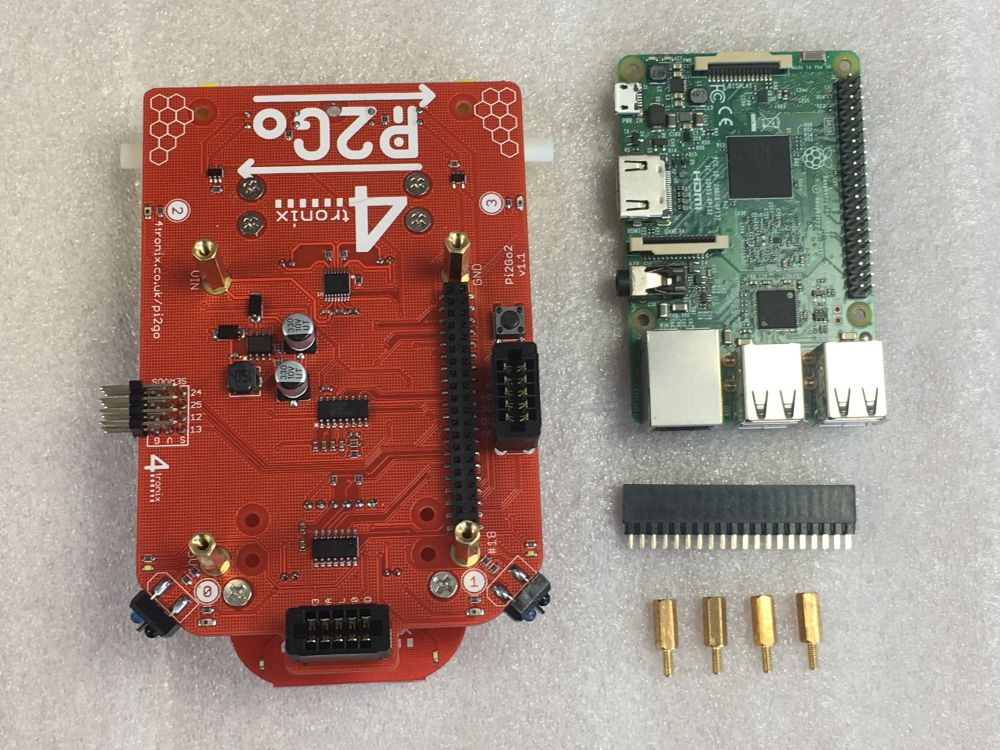
Step 1 – Check the Contents
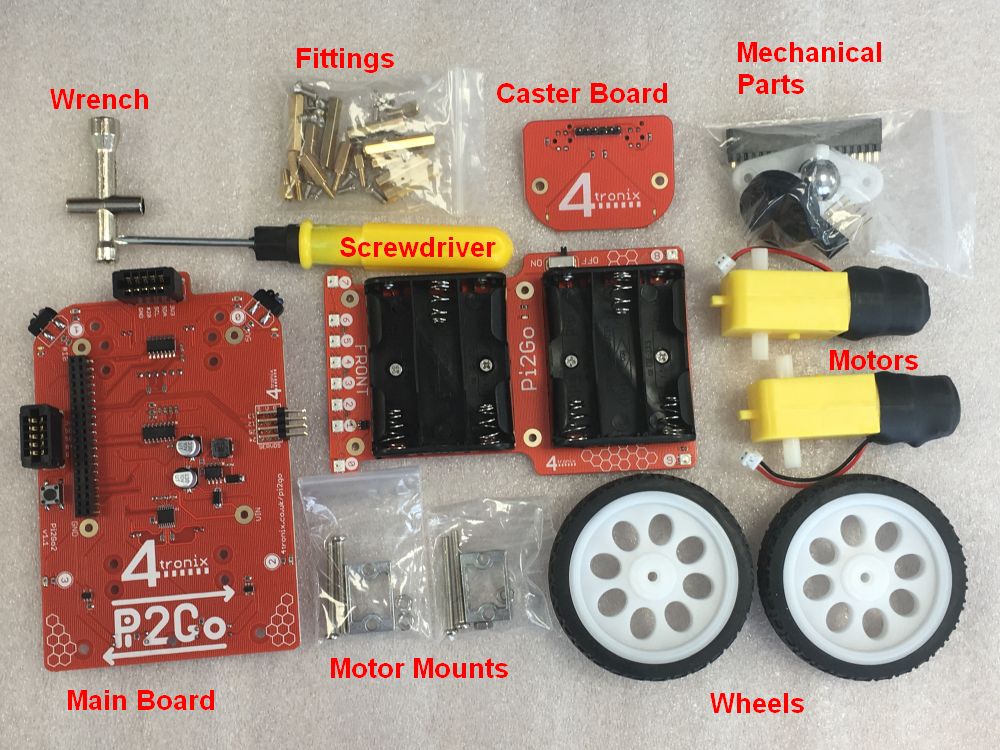
Check you have:
- Main Board
- Battery Board
- Caster Board
- 2 Wheels
- 2 Motors
- 2 Motor Fixings Bags
- Bag with mechanical parts (caster, encoder disks, headers)
- Fixings Bag with screws and spacers
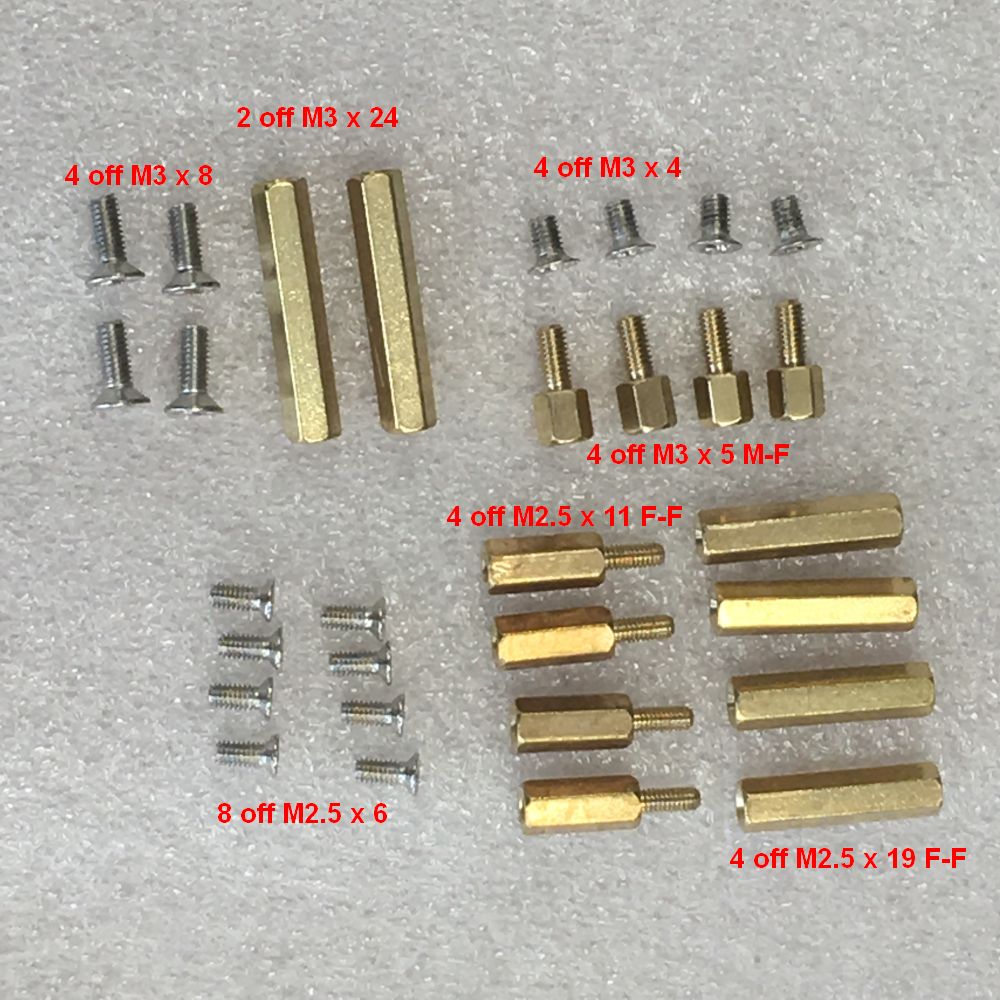
Fixings bag contains:
- 4 x 5mm, M3, Male-Female pillars
- 4 x 11mm, M2.5 Male-Female pillars
- 4 x 19mm, M2.5 Female-Female pillars
- 2 x 24mm, M3, Female-Female pillars
- 4 x 4mm, M3 screws
- 4 x 8mm, M3 screws
- 8 x 6mm, M2.5 screws
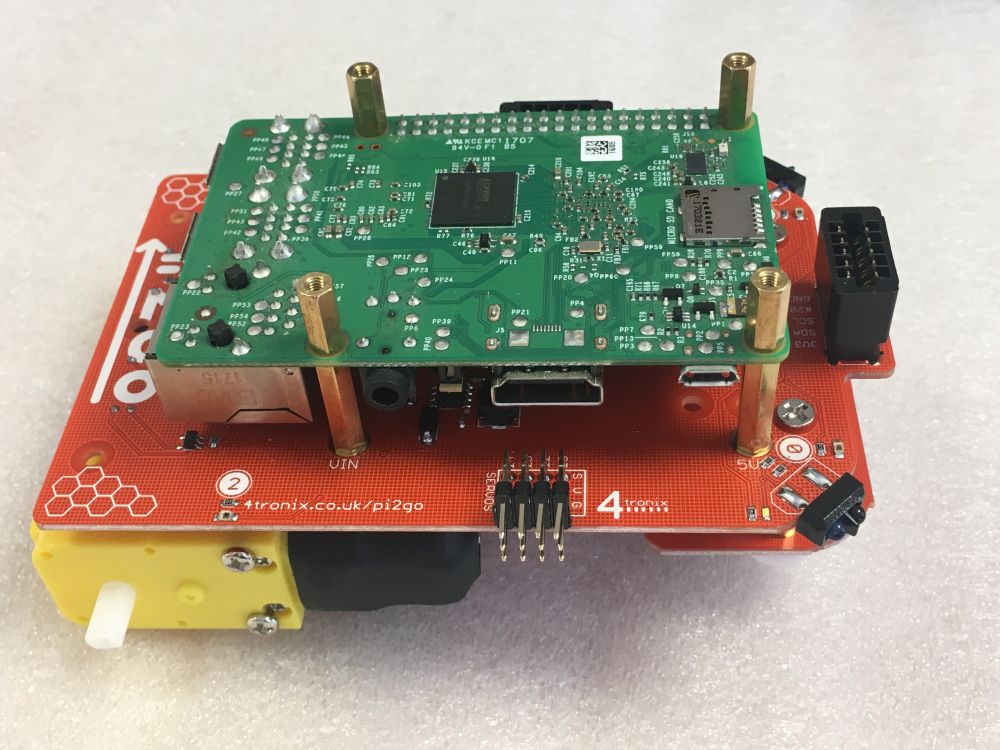
Step 2 – Fit the Raspberry Pi Mountings

You will need 4 x 19mm, M2.5 pillars and 4 x 6mm, M2.5 screws.
Fit the 4 pillars to the main board as shown below

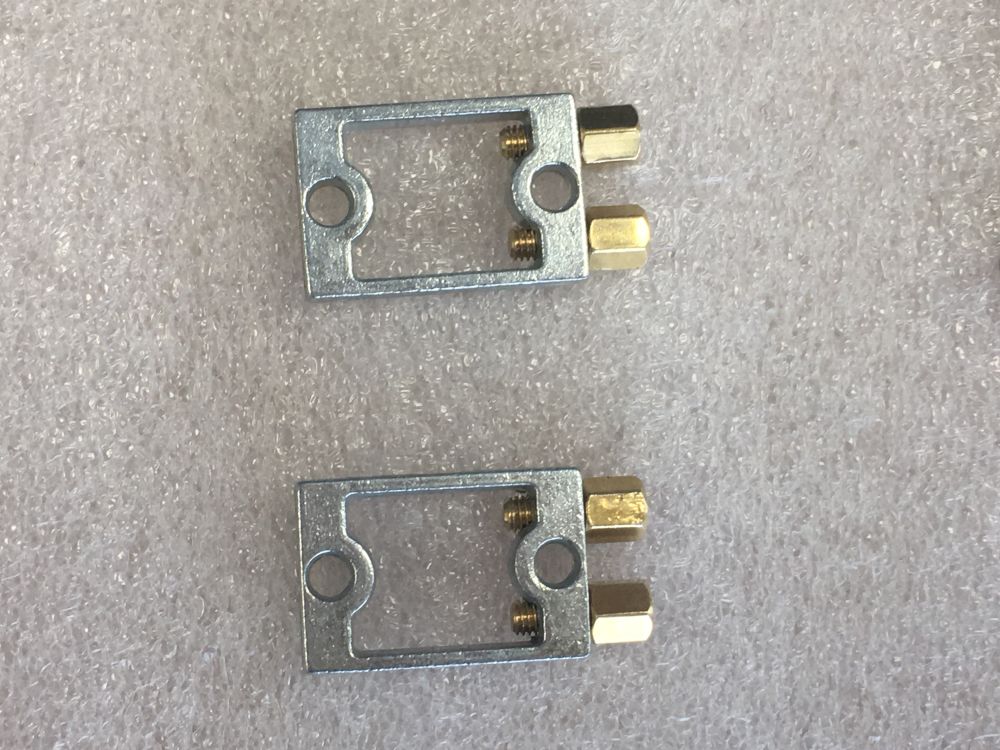
Step 3 – Prepare the Motor Mounts

Screw 2 of the 5mm, M3 pillars into the top of each motor mount. Ensure they are fitted tightly
Step 4 – Fit the Motor Mounts to the Motors

Pass one of the long screws from the outside of the motor (the side without the wires), through the motor and through the motor mount. Then loosely fit one of the nuts. It will sit at a strange angle as shown below
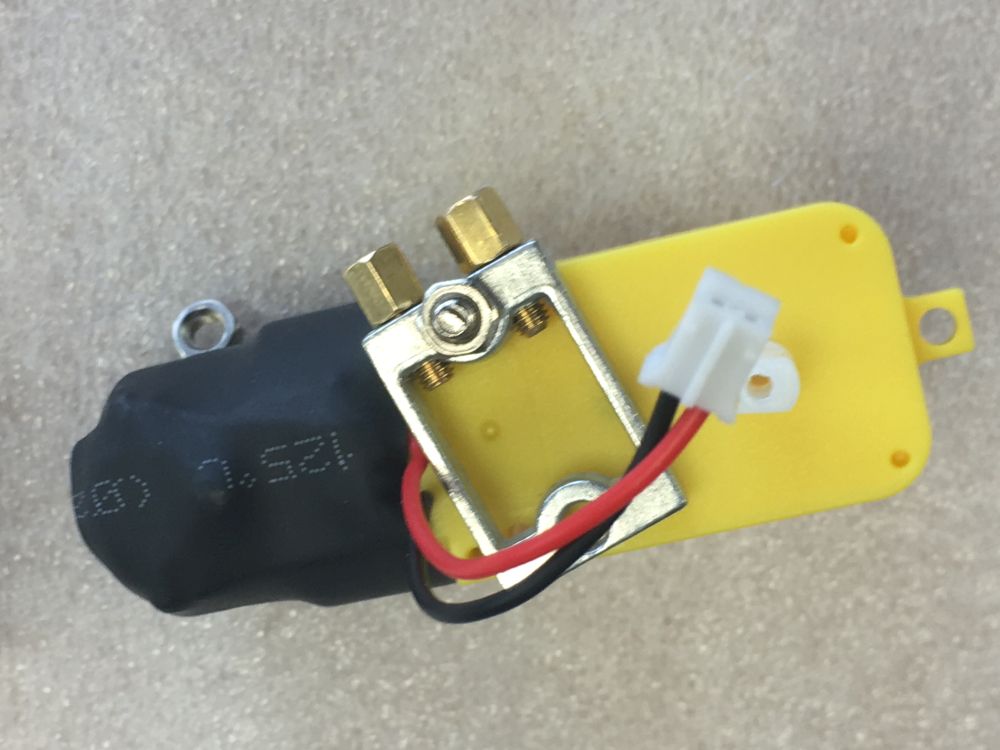
Then pivot the mount on the long nut, so that it pushes the wires out of the way and allows you to put the second long screw in. Then tighten up both nuts.
Repeat for the second motor, but fit the mount the other way up.

You should now have a left-hand and a right-hand motor assembly as shown above
Step 5 – Fit the Motor Assemblies to the Main Board

First, attach an encoder wheel to the inside shaft of each motor. Just push it on so that it is flush with the end of the shaft. It may take some pushing to get it on, and when it is on it will be a bit floppy. This is normal

Now use the 4mm, M3 screws, 2 for each motor, to screw through the main board into the pillars that you fitted into each motor mount in step 3


Step 6 – Assemble the Front Caster board

Use 2 of the 8mm, M3 screws to screw through the caster, through the caster PCB and into the 24mm, M3 pillars. Ensure the header pins are on the opposite side to the caster, and the same side as the pillars.

Step 7 – Fit the Caster Board to the Main Board

First push the extended 6-pin header into the header on the bottom of the main board, then plug the assembled caster board into the 6-pin header as shown below

Finally screw the 2 remaining 8mm, M3 screws through the main board and into the top of the pillars from the caster board. Tighten up well.

Step 8 – Fit the Raspberry Pi
You can use a Model A, A+, B or B+.
NB: To use a Raspberry Pi Zero, use the “Zero Spacer” PCB that is included with Pi2Go Mk2 since 1st September 2019. Kits shipped prior to that date do not include that spacer so you would have to use washers or similar to make up the extra 1.6mm height.
Push the 40-pin header onto the header on the main board

Then push the Raspberry Pi, upside down, into the 40-pin header, ensuring that all the pins line up and the mounting holes on the Raspberry Pi match the pillars
Screw the 11mm, M2.5 Male-Female pillars in well to hold the Pi firmly
Step 9 – Fit the Battery Board
Standard 6 x AA battery board shown. Fitting the other types is the same
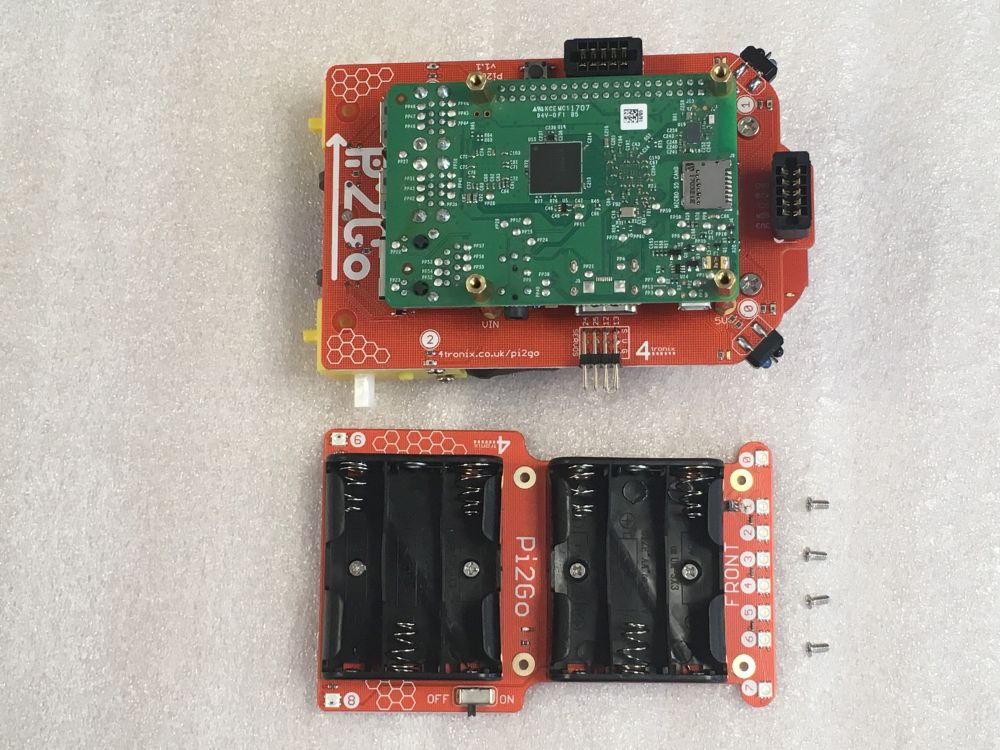
Making sure that the LEDs marked 0 through 7 are at the front, use the 6mm, M2.5 screws to fix the battery board tightly to the 4 pillars.
Note that these pillars all carry power and/or signals, so it is important that they are all screwed in well. Failure to attach screws or pillars properly will result in failure of the Pi2Go.

Step 10 – Add the Wheels
Push on the wheels
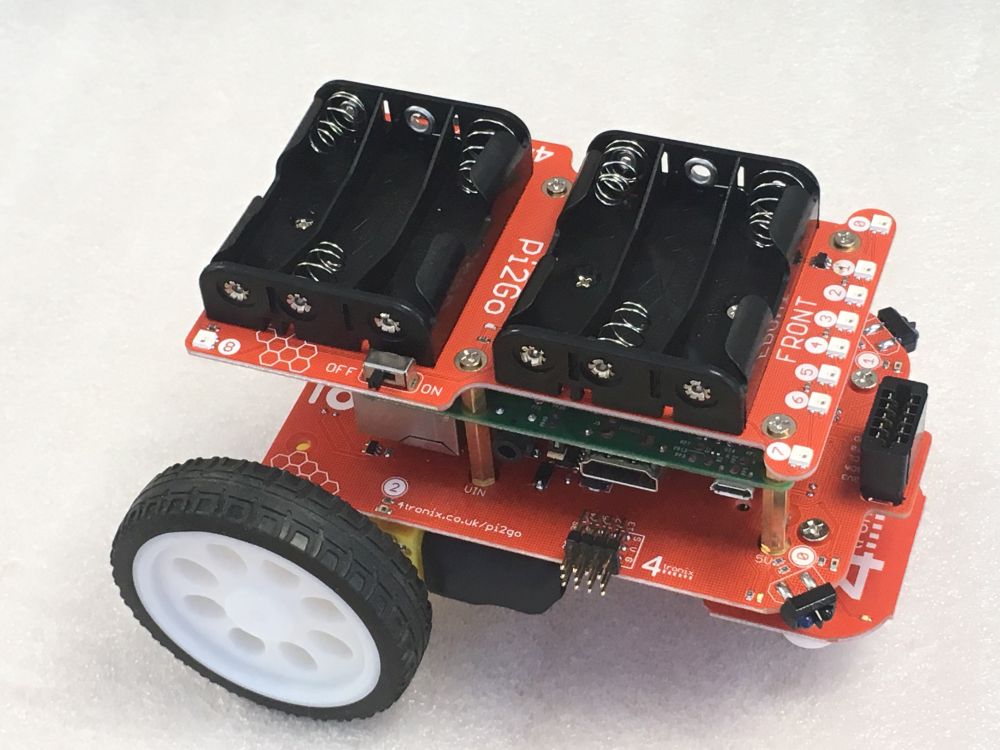
And the build is complete!
Now go to the Programming Pi2Go Mk2 article to get it going