Secondary Mirror Heaters
Click on any image to enlarge
Purchase Here
Overview
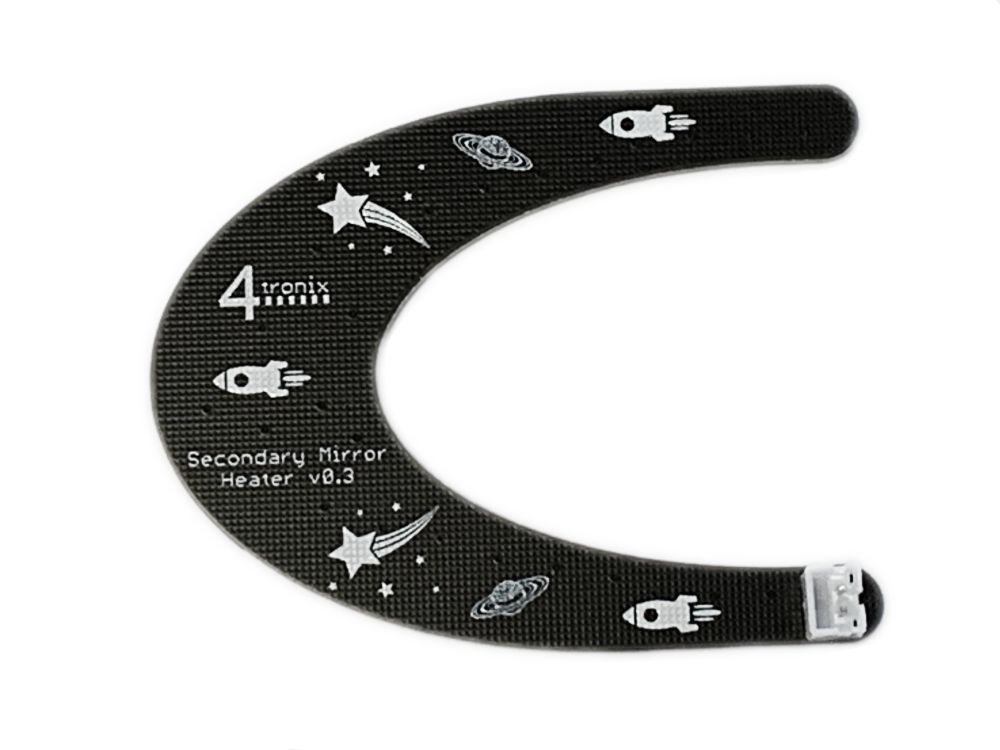
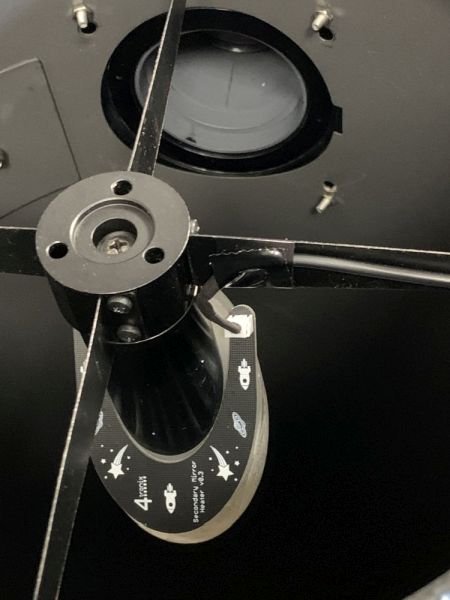
This heater panel is fitted to the rear of the secondary mirror in a Newtonian telescope (this model is designed for Skywatcher 200 or Celestron C8-N models).
A 12V supply, either direct or via a dew heater controller, is connected and then it will dissipate up to 3W over the rear surface of the mirror. This banishes dew and ice build up on the mirror’s surface.
The heater comprises 24 (varies with model) heater points (resistors) and so spreads the heat evenly across the surface. The heater panel is fixed using double-sided thermally conductive tape (included) or pre-fitted adhesive.
The connection to the panel itself is via a 2mm JST connector, but there is a JST to Phono cable included with thin wires to minimise damage to the light path.
Fitting Instructions
Step 1 – Check you have the Parts
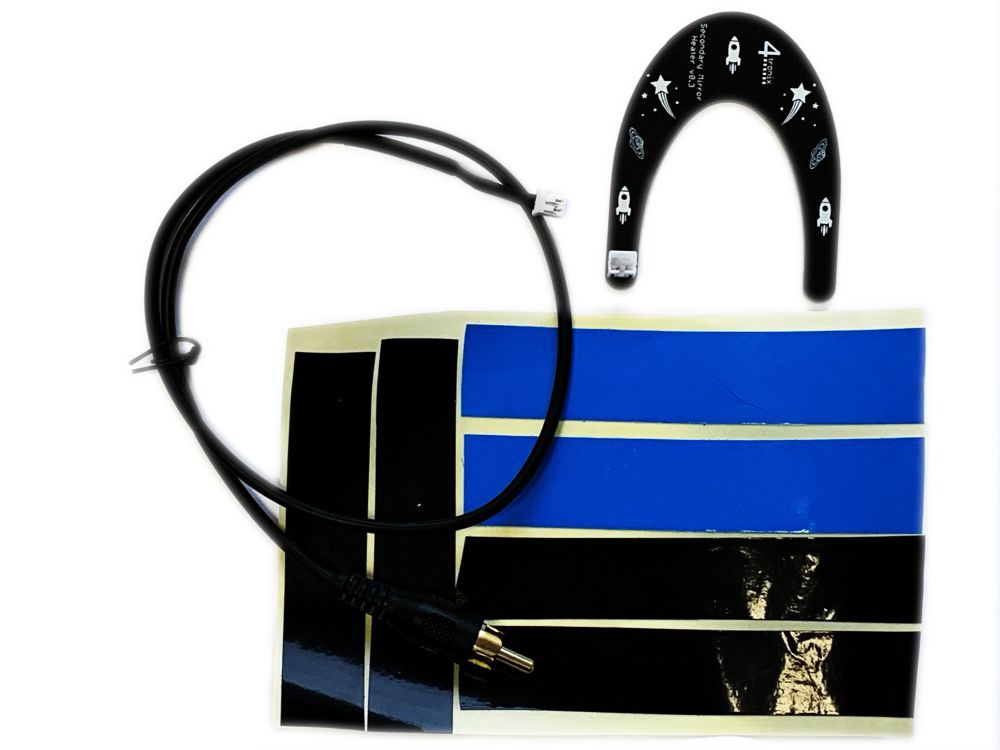
You should have:
- Heater PCBA
- JST to Phono lead 50cm
- Sheet with pieces of Blue thermally conductive tape and black insulation tape (some models are supplied with pre-fitted adhesive instead of the blue tape)
Step 2 – Fit the Thermal Tape to the PCBA

Some models are supplied with pre-fitted adhesive. For these, you should peel off the backing paper carefully, then place the heater on the back of the mirror. You can move it for a while as long as it isn’t prssed on too hard, then the adhesive will set harder. Skip to step 3.
If you have the blue tapoe, then peel off the tape from the backing sheet and apply it to the side with the resistor chips on, making sure to cover all of the resistors. Cut the tapes where they cross, to ensure that there is NO overlap – we need the same height of adhesive all over so it attaches properly.
Then trim the excess tape away from the edges using a sharp craft knife or scissors, so it now looks as shown above.
Step 3 – Prepare to Fit to the Mirror
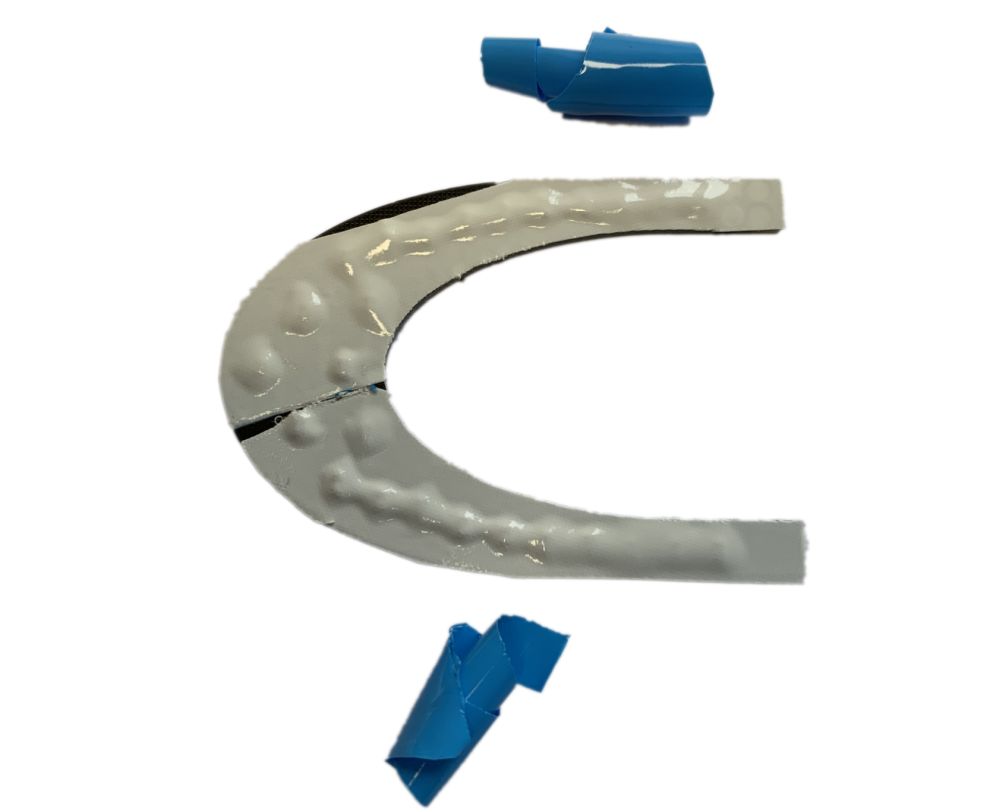
Peel the Blue backing tape off the double-sided tape as shown above.
You may find it easier to attach the Phono cable at this point. Pros: it’s easier to attach when the heater is not fixed to the mirror. Cons: it causes extra force on the heater while the adhesive is hardening (note that the adhesive never fully hardens, but it gets stronger after an hour or two – faster if the heater is switched on)
Step 4 – Attach the Heater to the Mirror
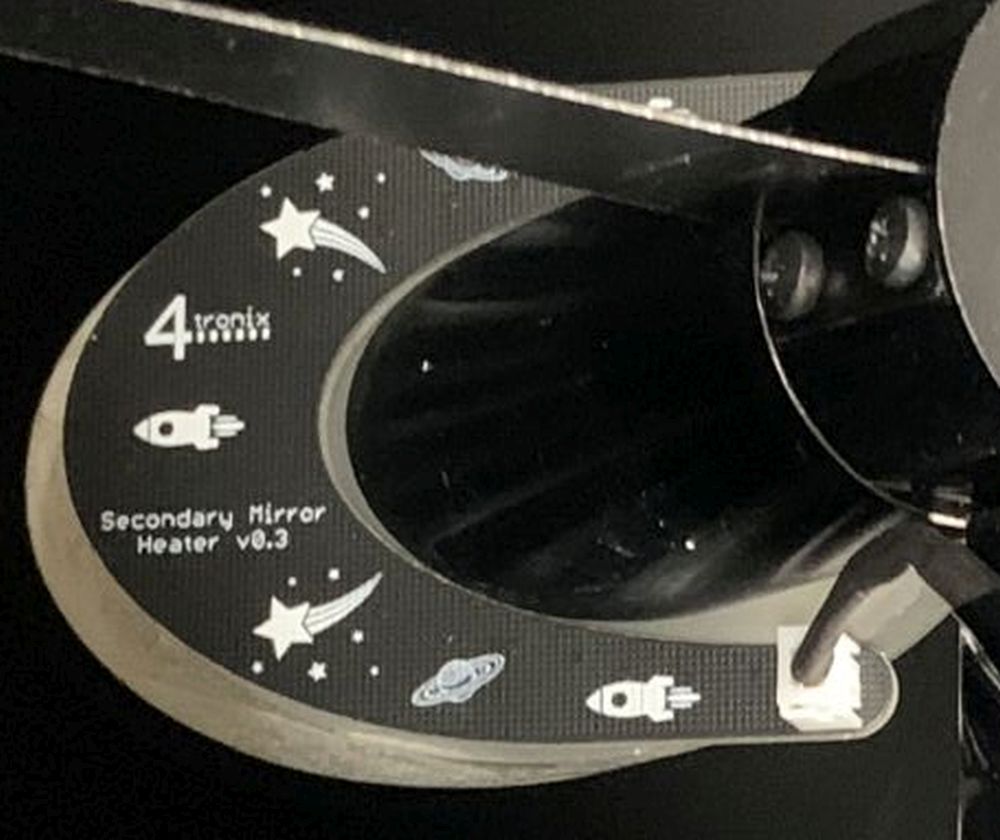
“Simply” press the heater PCBA onto the back of the mirror and leave it a while for the adhesive to cure. The adhesive does not harden fully, so you can always remove it in teh future if required.
The problem here is that a) you must not touch the front of the mirror with your fingers and b) you want to put as little force on the mirror mounting as possible. So use cotton gloves or a piece of tissue to protect the mirror and squeeze the PCB and mirror together – don’t push against the mirror, squeeze the two parts together.
Step 5 – Tape up the Phono Cable across the Mounting Vanes
Use the black tape provided to attach the cable to the mirror mounting vanes, doing your best to minimise the cable’s intrusion into the light path. You can run the cable along the top or the side of the vanes
Step 6 – Collimate your Telescope
With the best will in the world and taking great care, you are likely to have disturbed the position of the secondary mirror while fitting this accessory. You should collimate your telescope regularly anyway, so this shouldn’t be an issue. There are many online tutorials for collimation. I like this one:
Using Your Secondary Mirror Heater
This heater is designed to run off 12V DC. However, there is nothing specific about this voltage, so you could run at 5V or 20 V. At 5V it would give 500mW and at 20V it would give 8W – this is too much for your mirror. Unless the conditions are extreme, we recommend using at 12V, running at 50% on your PWM dew heater controller. If you don’t have one, then running at 12V is fine.
The 50cm cable provided is short, so that it can be left attached to the telescope at all times. To use it, you probably want an extension cable – these are available online from many places at reasonable prices and at different lengths. Search for “RCA extension cable”.