|
|
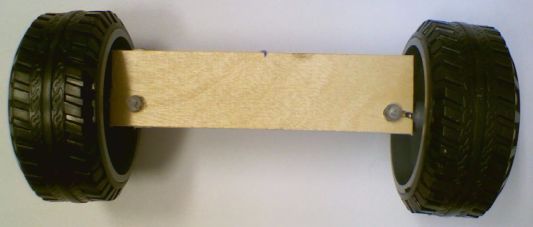
1. Make the front Axle
Requires 1 craft stick and 2 wheels (left and right handed mountings)
- Take one of the craft sticks and square off one end.
- Cut 8cm length
- Drill a 4mm diameter hole in the front corners (4mm from each side)
- Use hot-melt glue-gun to stick the left and right front wheels
|
|
|
2. Connect the Steering Servo
- Mark the mid-point of the8cn craft stick
- Glue the servo on at the mid-point
- Servo horn should point downwards at the rear of the craft stick
|
|
|
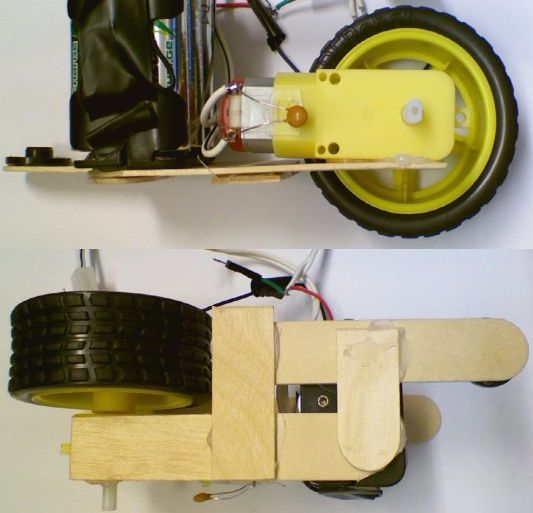
3. Make the Rear Platform
This part holds the motor, battery box, Arduino and Motor Shield
- Attach the wheel to the motor (on opposite side to metal contacts)
- Cut one craft stick to 10cm, leaving the curved end
- Glue the straight-cut end on top of the motor, with the curved end point forwards
- Cut another craft stick to 9.5cm
- Glue the twocraft sticks together using off-cuts. Note that the second (9.5cm) craft stick should be directly in line with the wheel
|
|
|
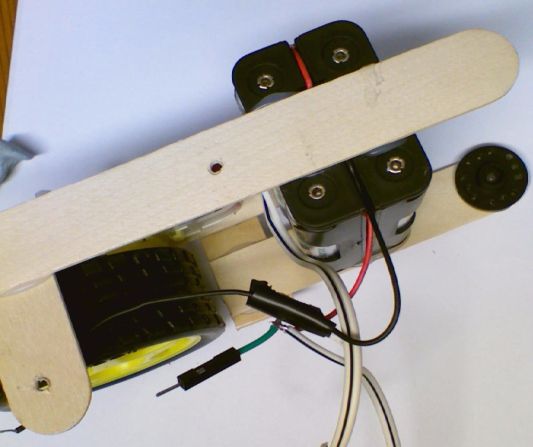
4. Make the attachment for the Arduino and Motor Shield
You will need the round Servo horn, battery case and some more craft sticks
- Glue the battery pack in place (at front of the two-sticks)
- Glue a full-length craft stick onto the top of battery case
- Cut an off-cut to 5cm (with curved end)
- Glue the 5cm off-cut to the full-length craft stick. Ensure that it is in the correct place for mounting the Arduino
- Place an Arduino over the two sticks and mark the 2 mounting holes as shown
- Drill a 2mm pilot hole in each mounting position
|
|
|
5. Attach Arduino and Motor Shield
- Use the two small self-tapping screws to fix the Arduino Uno
- Do not over-tighten as the board will bend
- Solder three 6-way header strips to the motor shield as shown
- IMPORTANT: Remove and throw away the jumper labelled PWR on the motor shield (near the power terminals)
- Carefully plug the motor shield onto the Arduino
|
|
|
6. Connect The Front and Rear Frames together and add Ultrasonic sensor
- Ensure that the servo is in its mid position by gently turning the shaft
- Push the servo shaft into the servo horn
- This makes a good friction fit, but you may want to screw it in place also. To do this you should drill a hole in craft stick
- Glue the ultra-sonic sensor to the front of the servo, resting on the lip
|
|
|
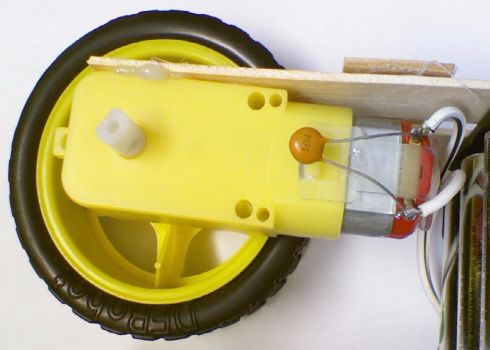
7. Add Noise suppressor and wires to Motor
- Solder the 100mF capacitor (orange blob marked 104) across the motor terminals
- Solder the 2-core white cable to the motor terminals
|
|
|
8. Complete the Wiring
- Plug the servo cable into SER1 plug, ensuring the Black wire is in the corner of the board as shown
- Connect the Ultra-Sonic sensor using the Female-Female wires provided:
- Vcc goes to the +5
- Trig goes to A0
- Echo goes to A1
- Gnd goes to Gnd
- Connect the black wire from the battery box directly to the GND terminal on motor shield
- REMOVE and THROW AWAY the jumper on the PWR - leaving this on WILL damage the Arduino
- Cut the Male-Female wire provided in two pieces:
- Connect one bare end to the Red wire from the battery box
- Connect the other bare end to the +M terminal on motor shield
- You can now use the Male-Female jumper as a crude switch to turn off motor power
- Connect the Arduino power connector to the M+ and GND terminals on Motor Shield
- Take the twin-core wire from the motor and connect to the 2 M4 terminals on the motor shield
|
|
|
The Completed Robot
- Add in 6 good quality AA batteries. We prefer Energizer Rechargeable Extremes
- Install the Adafruit motor shield library from this link
- Download some demo code from >HERE<
- Switch it on by plugging together both halves of the Male-Female wire
- Watch it try and avoid obstacles
- Then....
- ... improve the code! I'm sure there are plenty of bugs and improvements that can be made
- Do let us know how you get on
|